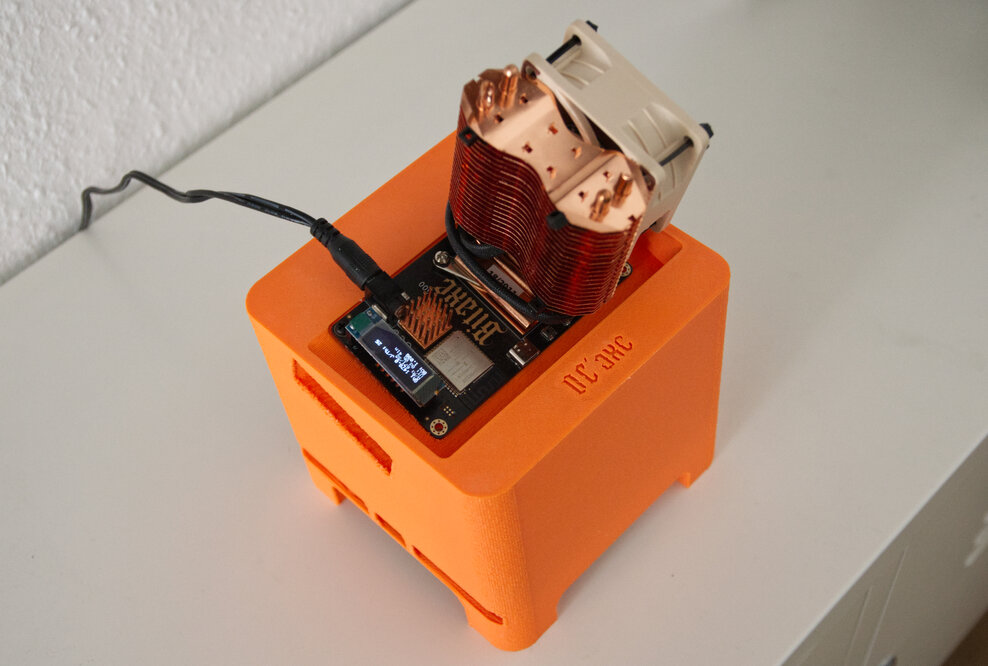
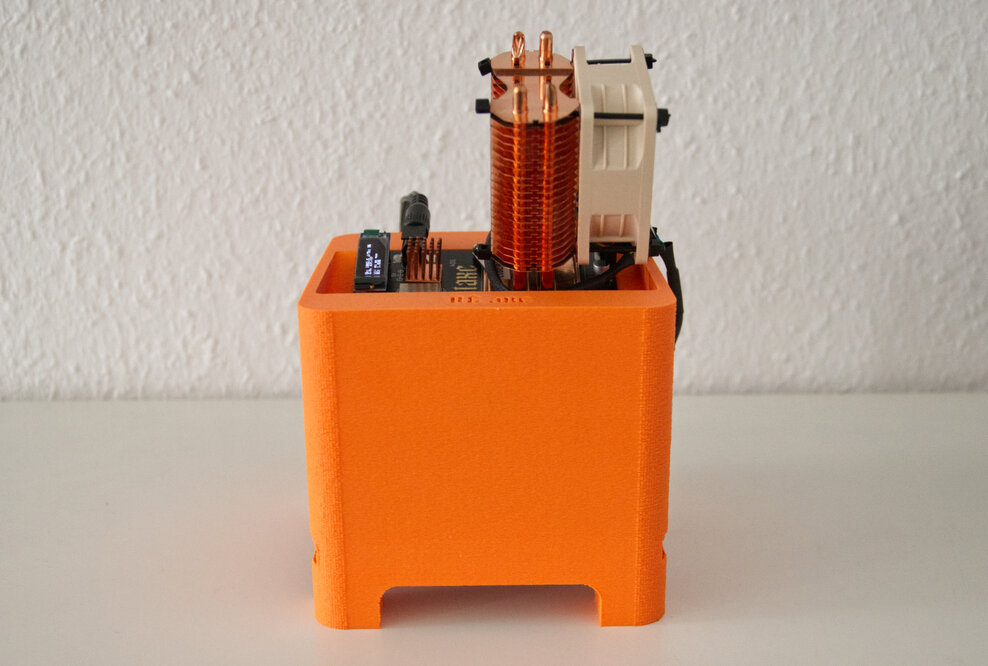
Cracking nuts with the Bitaxe while following the white rabbit


30. September 2024, 02:32
Hannover,
Germany
Guide

You are here because you either have a Bitaxe or are interested in one. In this article, we will cover the topic of how to increase the performance of an open-source miner and thus increase its hashing activity. From normal to extreme.

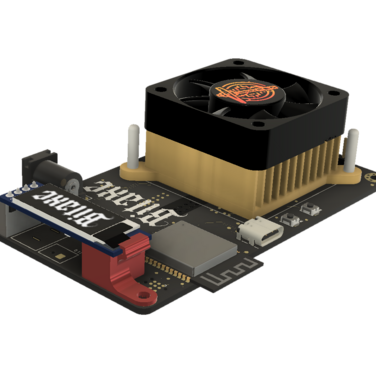
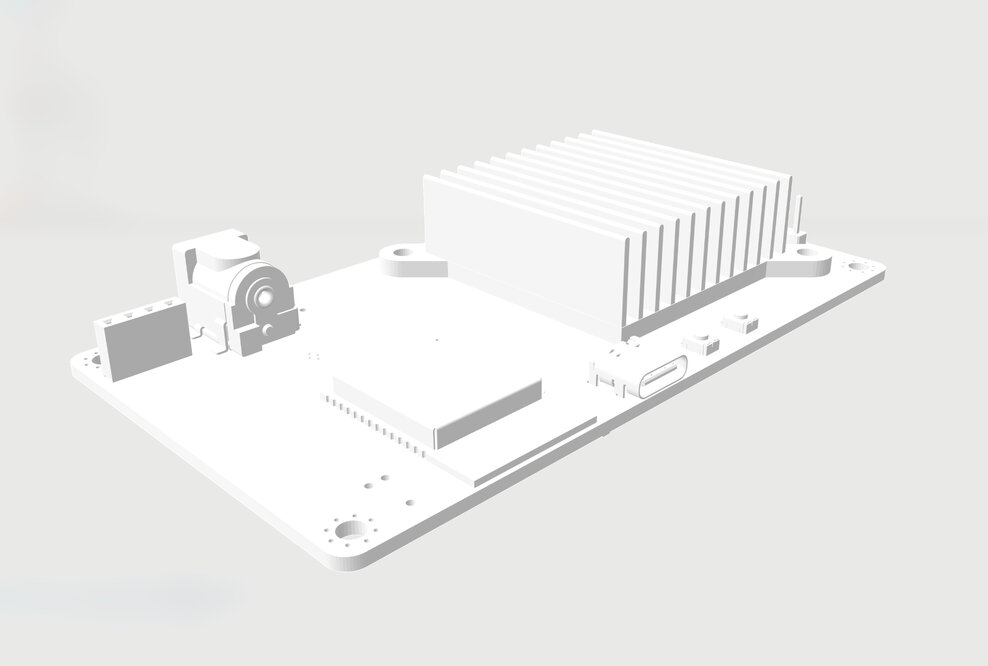
Bitaxe sterilized in a 3D model

Introduction: what a Bitaxe is and how it came about, what it is good for and so on, can already be found on various websites and video platforms. If not, here are some links that will help you on your Bitcoin home mining journey and you can help support the security and decentralization of the Bitcoin network with your efforts.


But today we would like to look at what overclocking a Bitaxe achieves, what advantages and disadvantages arise from it and, above all, how far a Bitaxe can be pushed under air cooling.

But first, let's start at the beginning.


Why overclock?

There are many reasons for overclocking or optimizing the ASIC speed or voltage. The primary goal of overclocking is to ensure that the ASIC ship produces more hash rate and thus not only processes more shares, but also gets “better” shares with higher difficulty. This means that the chance of solving a Bitcoin block and receiving the current reward of 3,125 Bitcoin including fees is increased due to the better quality of the shares and the higher number.

Why overclock Bitaxe?

Overclocking can also be useful if an older generation of the ASIC is installed on your Bitaxe and you either don't yet have the current generation, or if a current generation like the Bitaxe Supra is used and you are waiting for the next generation, but want to significantly increase performance.

But also for operating a unit with solar power, overclocking is recommended here to get the highest possible hash rate out of the delivered amount of electricity. So there are many reasons to overclock the Bitcoin Miner.

Basic principles of overclocking.

Overclocking the processor, in this case an ASIC chip, is easy to explain. Cool the processor, increase the clock and voltage, and the processor calculates the operations faster. But be careful here, an ASIC chip behaves slightly differently when overclocked than when overclocking a processor in your computer. ASIC chips need a certain temperature to work optimally, so there is little point in putting the ASIC in the freezer in the hope of achieving new records.


The recommended working temperature range for an ASIC chip is between 47-67°C, with optimal values being 50-60°C. Within the optimal working range, the ASIC chip delivers the highest possible performance and provides correspondingly high hash rates within the ASIC generation.

The critical range of the CPU is 70°C. If this is reached or exceeded, the overhead function switches on and shuts down the miner or restarts it with extremely limited settings to protect the ASIC chip. If this occurs, it is necessary to check whether the cooling solution is not working correctly or whether the overclocking has simply been set too high.

ASIC CPU

ASIC processor and Bitaxe generations

Bitaxe may be new to many, but we are now in the fourth generation of the open source miner, Bitaxe Gamma being the official name.

ASIC processors for the Bitaxe are either new or are recovered from old defective or discarded miners and brought to life. Thus, this open source community behind the project is just as oriented towards sustainable and environmentally friendly practices. The actual Bitaxe project has since given rise to many other side projects, and every day the hard-working and constantly growing community comes up with new ideas.

Enclosed is an overview of the previous Bitaxe versions, including information on which miners the processors were extracted from and in which industries the miners were used. Also included is the average possible hash rate that could be achieved with the respective model.

Bitaxe Model Series

ASIC Chip

Used On

Expected Hashrate

Bitaxe Max

BM1397

Antminer 17 Series400 GH/s 
(up to 450 GH/s)
Bitaxe Ultra

BM1366

Antminer S19 XP/S19k Pro500 GH/s 
(up to 550 GH/s)
Bitaxe Supra

BM1368

Antminer S21625 GH/s 
(up to 775 GH/s)
Bitaxe Gamma

BM1370

Antminer S21 Pro1.0 TH/s 
(up to 1.2 TH/s)

Bitaxe Max (100 Series): The Bitaxe Max is your gateway into the world of Bitcoin mining. Fully assembled with a heatsink, fan, and 5V socket, it’s designed for plug-and-play readiness. Running on just 15W, it optimizes energy usage while delivering robust performance.

Bitaxe Ultra (200 Series): The Bitaxe Ultra sets new standards for enthusiasts who demand high performance and efficiency. It comes fully assembled and ready to operate, championing the spirit of open-source with unmatched flexibility and customization options.

Bitaxe Supra (400 Series): The Bitaxe Supra stands at the forefront of Bitcoin mining technology, embodying peak performance and exceptional energy efficiency. With advanced cooling options and a hashrate of up to 700 GH/s, it ensures you remain competitive in the Bitcoin mining landscape.

Bitaxe Gamma (600 Series): The Bitaxe Gamma represents the pinnacle of open-source mining technology. With its groundbreaking performance and efficiency, it offers individual miners access to enterprise-level mining capabilities. The Gamma continues the Bitaxe tradition of full assembly and plug-and-play readiness, allowing miners to harness this incredible power with minimal setup.

Source: https://d-central.tech

Evolution of the coolers on the Bitaxe

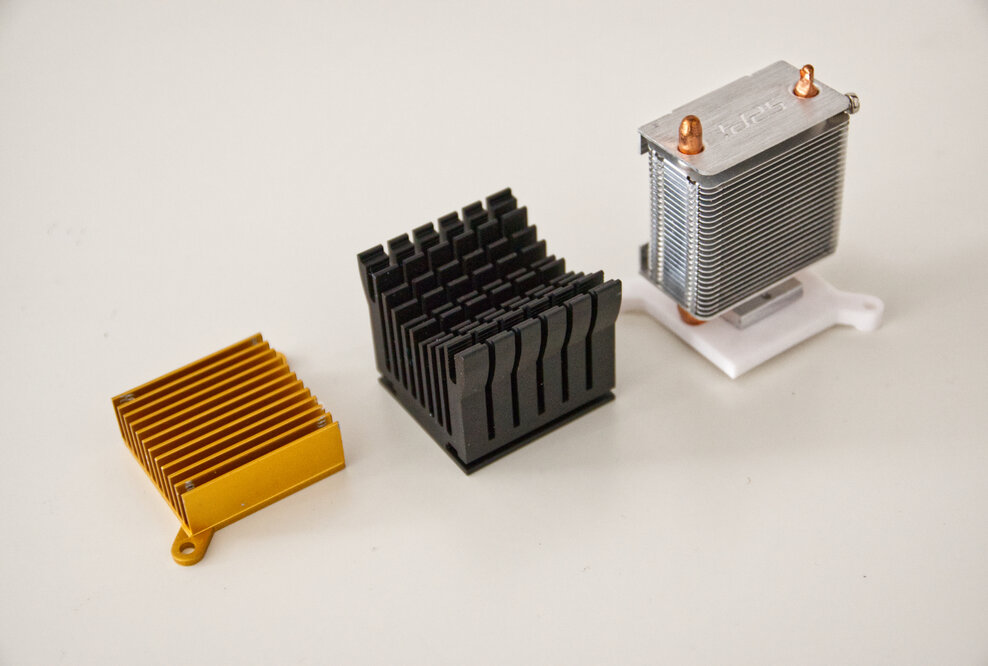
Usually, inexpensive but not very powerful standard aluminum coolers are pre-assembled with the Bitaxe. You might think that they were only bought from one dealer because most of them are yellow – the cooler dimensions are 40x40x15 mm. This cooler is usually sufficient to run the Bitaxe Miner with pre-set settings, regardless of which ASIC generation was delivered. Whether a Max, Ultra, Supra or the current Gamma, it works, but nothing more. Problems can arise if the miner is located in a warm region/country/room. This is mainly because a very loud and inexpensive fan is usually installed with these coolers. A Noctua fan can help here, but more about that later.

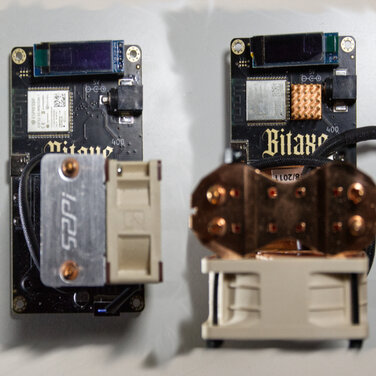
Different coolers for the Bitaxe, with possible upgrades to increase cooling capacity.

The cooler can be replaced very easily; it is held in place by 2 or 4 plastic pins. In most cases, an exchange is actually recommended to protect the hardware and increase the lifespan of the ASIC processor, to have the fan run slower (which also saves electricity). The next higher after-market model, which can actually be purchased very cheaply, is a cooler made of aluminum with the dimensions 40x40x40 mm. Due to the higher mass, the ASIC can transfer heat to the cooler much better and the fan can cool the finer and longer pins much more effectively. With this update, you are already on the safe side if you want to slightly overclock the Bitaxe, with the options available in the Settings menu.

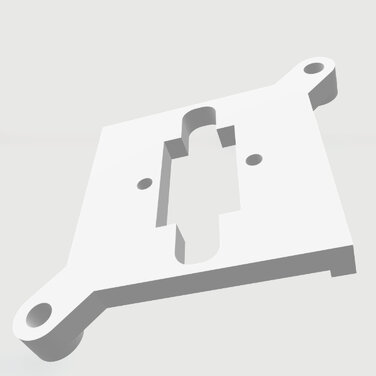
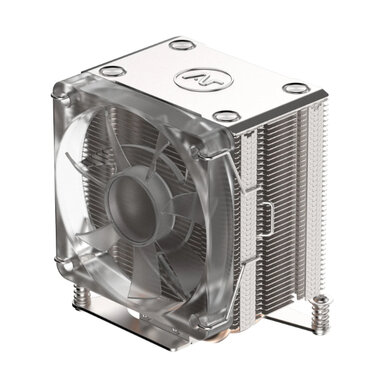
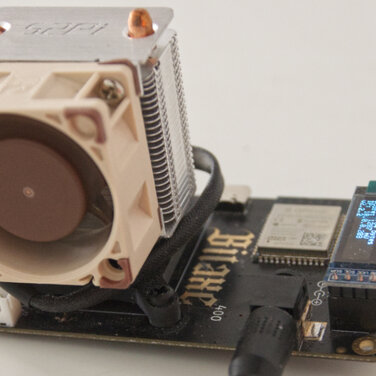
The next generation of coolers for the Bitaxe was first introduced into the game by D-Central in combination with the Bitaxe Supra, the “Ice Tower” from 52Pi. This cooler was developed for the Raspberry Pi, but thanks to its compact size and a 3D-printed adapter, it can be mounted on any currently available Bitaxe. The special feature is that the cooler resembles a small minitower cooler with two copper head pipes. The fan is attached to the side and, as an overall concept, significantly increases the cooling performance. With this cooler model, all overclocking options can be used in the Bitaxe settings, especially when combined with a more powerful Noctua fan.

Be careful with the black 52Pi cooler, where the heat pipe is unfortunately also anodized. This process significantly reduces the cooling performance, as Isaac noticed on X. In the silver version, the copper ehat pipe is open and thus delivers the full heat absorption capacity.

So sanding the anodized coating has advantages, just keep in mind that the surface must be VERY smooth after sanding. 

Black anodized 52pi reduces cooling performance.

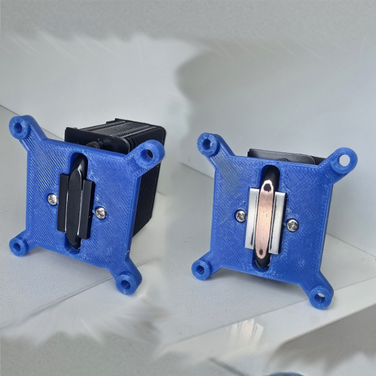
The creative and effective idea of the Canadians was also adopted by some other retailers. If you want to upgrade the cooler for your Bitaxe to this model, don't forget the necessary 3D printed adapter. This can be ordered for little money in already printed condition in some shops, or at D-Central on the website for free as a 3D model to be downloaded and printed by yourself.

Some creative plebs have also made this adapter available for free on the usual 3D model platforms.

Ice Tower 3D printed adapter for the 52 Pi cooler on the Bitaxe

And now the next generation, which is also being offered by D-Central for the first time in combination with the Bitaxe. It is possible to order the aforementioned cooler pre-assembled in every Bitaxe variant.

The almost frightening “Argon THRML 60mm Radiator Cooler”, which was also developed especially for the new Raspberry Pi 5. This cooler makes it possible for the first time to attach a 60 mm fan, which significantly increases cooling performance, but can also operate much more quietly or even silently. The size of the cooler is so enormous that it almost visually dwarfs the Bitaxe.

Argon THRML 60mm Radiator Cooler

With this combination of coolers, all the overclocking options available in the settings menu are actually possible, and much more besides. As Joshua impressively shows on X.com, overclocking the currently popular Bitaxe Supra to 900 Mhz and an average hash rate of 1100+ Th/s is possible. 

The Bitaxe Supra can be overclocked up to a maximum of 733 Gh/s if you are satisfied with standard settings.

Joshua is benching

Evolution of the fans on the Bitaxe

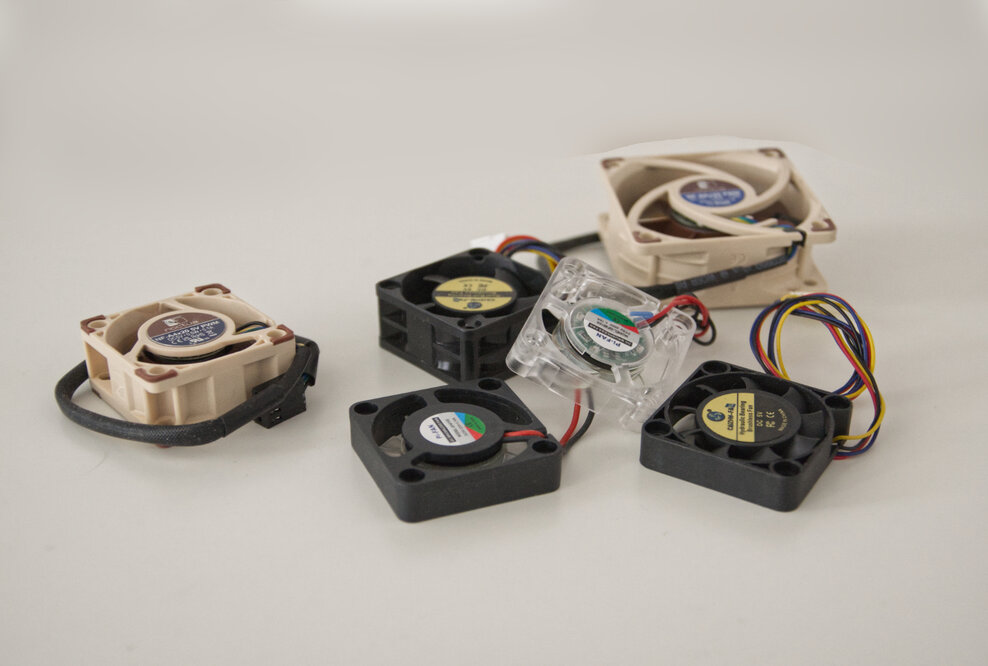
In most cases, and probably due to their mass distribution, the fans are 40x40 mm fans that have a high speed, are very loud and do not always deliver optimal performance. They are used to cool the ASIC processor via the heat dissipation to the cooler. If the Bitaxe was delivered with the standard cooler and fan, it is not recommended to overclock it at all and rather let it run in a cooler room. It is simply the most minimal solution so that the small home miner can run and the ASIC processor does not overheat in the best case. Likewise, such air conditioners are not suitable for use in a room where quiet is desired, such as in the living room, bedroom or living room.

Different fans for the Bitaxe, from really bad to premium.

So even if a standard cooler is used, it is almost always recommended to install a better fan. The almost unrivaled Noctua in the 40mm version is ideal here. There are two models and you should definitely make sure that you buy a 5V fan and not a 12V one. Also make sure that it is a PMW version, which means that the fan speed is automatically controlled according to the temperature of the ASIC chip, thus achieving the optimum speed.


The Noctua NF-A4x20 5V PWM should be preferred because it offers a significantly higher air flow rate and thus cools the cooler more quietly and effectively.

The Noctua NF-A4x20 5V PWM can be used with a range of different coolers in the 40x40mm size, regardless of whether it is a 40x40x15mm, 40x40x40mm or the recommended “Ice Tower” from 52Pi. The best cooling performance and low noise can be achieved with the combination of the “Ice Tower” from 52Pi and Noctua NF-A4x20 5V PWM if you want to stick with the 40x40mm form factor.

The next generation of Bitaxe, the Bitaxe Gamma, has also produced a new larger cooler, as already mentioned above. This cooler will operate with a 60x60mm fan and can thus cool the ASIC chip even more effectively and quietly. A useful fan is already included with the “Argon THRML 60mm Radiator Cooler”, but you can increase the cooling capacity enormously by exchanging the fan and take it to the next level. A Noctua fan is also suitable here, which is also available in several versions, but only one version makes sense: Noctua NF-A6x25 5V PWM

The Noctua NF-A6x25 5V PWM in combination with the Argon THRML cooler currently offers the absolute best possible option for an air-based cooling concept. Even without overclocking, the enormous cooling capacity protects the ASIC chip and thus exorbitantly increases the lifespan of your miner. As mentioned above, overclocking is also possible outside of the specified limits.

Additional cooling concepts

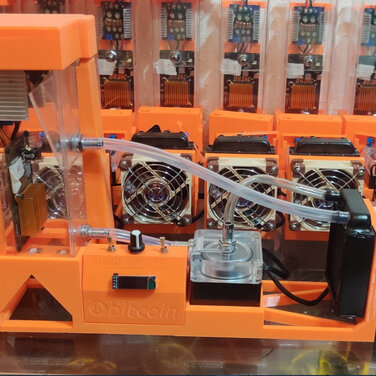
The most common cooling solution is an air-based cooler, although some people like to experiment with other cooling concepts. These allow a significantly higher hash rate yield, so even an older Bitaxe Ultra Model can be operated at up to 1.4 Th/s.

We are talking here about a cooling solution based on liquid ice, immersion, where the heat transfer takes place via oil, which is cooled in a radiator and pumped back into the oil pool. The idea gave rise to a project that is slowly gaining ground in the mass market for enthusiasts: the “ImmergeAxe” project, developed by μολὼν λαβέ Holdings. Currently, a version of the “ImmergeAxe” for the Bitaxe Supra has been developed for mass production, lovingly assembled and distributed. With the current project status, an incredible 2 Th/s hash rate can be achieved from just one ASIC processor, which is actually designed for a maximum of 733 Gh/s.

ImmergeAxe for Bitaxe Supra

You can follow the entire progress of the project on the user's X-Account, and μολὼν λαβέ Holdings is also developing a self-sufficient mining station based on photovoltaics, “Solarbit”. So feel free to take a detailed look at this very exciting concept as well.

Electrical power supply and fuse protection

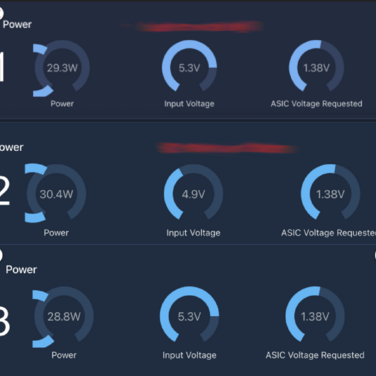
Another important issue is the power supply of the Bitaxe. Most retailers deliver a power supply with the Bitaxe, but unfortunately the included power supply is absolute junk. It is almost never suitable for overclocking the Bitaxe and already delivers too little voltage at standard settings. The Bitaxe expects a stable voltage of 5V. So it is really recommended to use a different power supply with a 5V specification.

You can buy very good power supplies for little money, starting at just 35 watts of power, if you don't want to overclock but want to ensure a stable power supply.

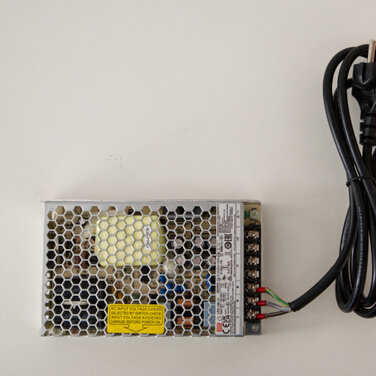
Enclosed is a list of power supplies that you can use without hesitation. Note that the number of possible Bitaxe can also vary, depending on the Bitaxe generation/model and overclocking. The most common models used by many in the community are MEAN WELL LRS-100-5 and MEAN WELL LRS-200-5. With these models, you are on the safe side and experience shows that you will need more than one Bitaxe when you first start using this topic.

NameWattAmpereBitaxe units
MEAN WELL LRS-35-535 W7 A1
MEAN WELL LRS-50-550 W10 A1-2
MEAN WELL LRS-75-570 W14 A2-4
MEAN WELL LRS-100-5100 W18 A4-6
MEAN WELL LRS-200-5200 W40 A6-10
MEAN WELL LRS-300E-5 ´300 W60 A10-18

Note that you should use a good power wire with a protective contact plug with CEE/4 certification. Read the assembly documentation for the power supply unit carefully. 

If you have no experience with such power supplies, find an electrician who can prepare the power supply for you. After successfully attaching the cable, secure the open power pins with hot glue so that nothing can accidentally fall on the contacts or you accidentally touch the contacts. 

Caution: improper use can result in death!

Select the right power cable cross-section

It is very important to consider that in the case of a custom power supply like the Mean Well, it is essential to ensure that a sufficiently dimensioned power cable cross-section is selected. Cable cross-sections are marked with the AWG guideline, note that higher AWG indicate lower cable cross-sections. So here it is important to choose a value that is as low as possible.

In fact, I found a power supply that came with the Bitaxe Ultra that was labeled AWG 24... Such a cable is dangerous because it can burn through the high current and cause a fire in the house.
 

AWG sizecable cross-section in mm²current carrying capacity in amperes

1

42,38

180 A

2

33,61

170 A

3

26,65

154 A

4

21,14

120 A

6

13,29

95 A

8

8,35

75 A

10

5,26

52 A

12

3,32

34 A

14

2,08

24 A

16

1,31

20 A

18

0,82

9,5 A

20

0,52

6,0 A

22

0,33

5,0 A

24

0,21

3,5 A

Current carrying capacity of flexible AWG (single conductor)

Especially in the case of a custom power supply, make absolutely sure that the selected cable is at least AWG 18.

90° angled DC plugs are particularly popular and practical; these can be conveniently ordered from Amazon or Aliexpress. I have noticed that many are offered in AWG 20-22 and of course are particularly cheap. 

You can NOT use these cables with the Bitaxe.

A small, current case study that shows how important it is to use power cables of good quality and the right cross-section. Just by changing the wire, I was able to significantly exceed my personal overclocking record, which is listed below in this article. 

The cables I tested, which are 16 AWG and actually exceed the specification with 2 x 1.5 mm² copper wire, can be purchased here. So far, I have not been able to find any other manufacturers that deliver similar quality.


Get yourself some high quality power wires. Voltage drop from series resistance is tough when the current is high and the voltage is low…

Optimizations and alternatives

Thermal paste

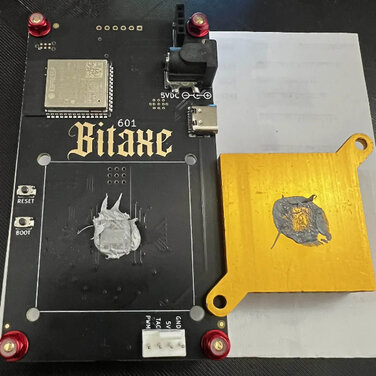
Probably the cheapest and first thing to do is to change the thermal paste, immediately after buying the Bitaxe, regardless of which cooler you are using. This measure alone can significantly improve the heat transfer from the ASIC chip to the cooler, making it much cooler and more effective. In fact, the fan will not have to work as hard either and will run at a significantly lower speed, thus consuming a little less power, which further increases the efficiency of the Bitaxe.


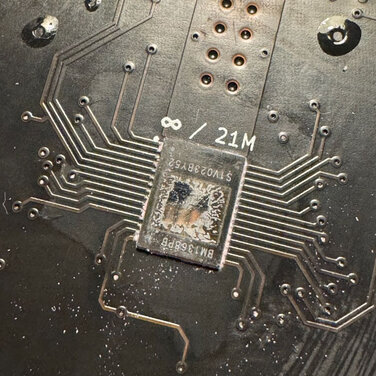
Here is a negative example of how it should not be, but is usually delivered by the manufacturer/dealer.
In this example, at least the amount of thermal paste has not been saved. However, it is completely exaggerated to deploy so much thermal paste at this point.

Which thermal paste is chosen is difficult to answer, this topic has occupied many people for many years and almost resembles a religion. Here are some recommendations that I have successfully used for overclocking in recent years. It is simply important that the thermal paste has the highest possible heat transfer efficiency (W/m.K), the higher the value the better the thermal paste.

Thermal paste fail on Bitaxe Gamma

Here are some thermal pastes that we have successfully used and that are very suitable for ASIC overclocking purposes.

Cooler and Copper heat sink

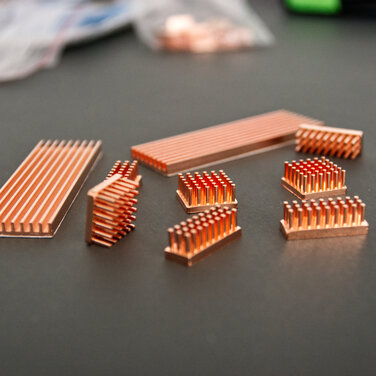
Copper is the perfect conductive material when it comes to heat transfer. There are certainly other metals that have a higher transfer coefficient, but these are unaffordable and have a very poor cost-performance ratio. But even copper in larger quantities is significantly more expensive than aluminum, but offers incomparably better results than aluminum.

You can stick copper heat sinks to each Bitaxe mosfet, which generate a very high temperature. This guarantees significantly faster and better heat dissipation, helps you to overclock, but also increases the lifespan of your miner.

ASIC coolers made of copper are actually hard to find because the market is relatively small and manufacturing is expensive. However, in the years 2000-2015, many copper coolers were offered for the Nehalem bridge of a computer mainboard, which were actually very cheap and, thanks to their 40x40 mm compatibility, perfect for the Bitaxe.

Cooler and Copper heat sink

So if you still have an old computer or can get one of these coolers on the second-hand market, feel free to get one. Such coolers are actually significantly better than the currently available reference model in the form of the Argon THRML. One such copper Nothbridge cooler is, for example, “Ötzi” from “Alpenföhn”, which was produced between 2008-2011 and is unfortunately no longer available. The “Ötzi” is extremely massive, made of 100% copper and weighs 139.5 grams, it is simply a monster for the Bitaxe and is an absolute reference model.

Screws instead of plastic pins

In fact, a very effective and inexpensive optimization is to replace the plastic pins with screws on the cooler attached to the Bitaxe PCB. The significantly higher contact pressure allows the heat from the ASIC to be transferred much better to the cooler.

In fact, drastic improvements of 5-10°C can be achieved with this measure. But be careful, tighten the screws carefully, too much pressure of the cooler on the ASIC can destroy the ASIC chip. Experience is needed here or alternatively a 3D spacer can be printed to prevent the ASIC chip from breaking. M3 or M4 screws and nuts are suitable for mounting, in fact you can use plastic screws here to prevent over-tightening.

Screws instead of plastic pins on Bitaxe

Fan duct and/or second fan

With a little skill and imagination, fan duct concepts can be combined with the Bitaxe. Self-made fan duct solutions, for example, using an adapter from 80 mm to 60 mm, significantly increase cooling performance, but usually look unappealing. Likewise, a 3D-printed adapter is usually required that fits the cooler used. If you can't find a suitable one in the common 3D libraries, you will have to design one yourself using a 3D program. Likewise, screws with an integrated spring can help to relieve tension and thus protect the ASIC chip from damage.

Likewise, a second air vent at the back of the Bitaxe is extremely effective and not only protects the hardware and extends its lifespan, but also helps with overclocking. Not only the ASIC chip needs to be well and optimally cooled, but also the mosfets at the back and partly at the front. You can use any air cooler you like, but our recommendation is clearly Noctua fans because they are very quiet, efficient and powerful. The size is irrelevant, but the following fans would be perfect for this expansion:


If you are using multiple fans, we recommend getting a PWM fan hub. This allows you to connect multiple fans to your Bitaxe or power supply, or alternatively use the included Y-adapter from Noctua, where you can power two fans using the Bitaxe 4-pin fan connector.

Note: in certain constellations, when an air vent is attached to the back of the Bitaxe, the magnetic field can collide with the main fan for the ASIC on the cooler. This can occur in particular when a standard cooler or a horizontally mounted fan is attached to the cooler. However, this behavior has not been observed with the “Ice Tower” from 52Pi.

Protect display from bending

Not directly related to overclocking, but it is very helpful to secure the Bitaxe display against bending, especially when physical optimizations are being carried out. TheSoloMiningCo has provided a free 3D model “Bitaxe ScreenSaver”  that can be printed out. This way, broken displays are a thing of the past.

free 3D model “Bitaxe ScreenSaver”

Overclocking within AxeOS specifications

Normal overclocking above the specified values in the settings menu is easy to select and can be tested step by step. However, it should be noted that not every ASIC on the Bitaxe can be overclocked equally well. It is primarily due to the so-called Silicon Lottery, which indicates how well the ASIC chip itself was manufactured. Just as it is soldered cleanly, it is still an open source project and not all dealers deliver the same experience when soldering the necessary components.

But now a step-by-step guide on how to overclock sensibly and correctly, but keep in mind what was written above about the cooler, fan, thermal paste and especially the power supply: all of this must work together in harmony to achieve optimal overclocking results.

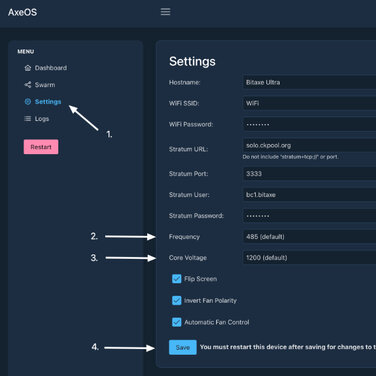
AxeOS Settings
  • Step 1: Read the above basics to understand the topic of overclocking and dependencies. Without the basics, you cannot determine the correct overclocking, and this can even cause damage to the Bitaxe. This is really important, so don't skip these points. Also, we do not take any responsibility for your actions. When overclocking, you are acting outside the specifications at your own risk.
     
  • Step 2: Open the setup menu in the AxeOS of your Bitaxe. Here you will see two fields for Mhz and vCore. With Mhz you overclock the ASIC chip directly, telling it the speed at which it should process operations. With vCore, you determine how much voltage the ASIC chip should receive. Both values must harmonize with each other for the overclocking to be successful and, above all, for the Bitaxe to work stably.


  • Step 3: Increase the Mhz setting by one level, at the same voltage. Save the configuration and restart the Bitaxe. The dashboard display of the estimated hashing rate is very accurate and reflects an average. Wait 5-10 minutes for everything to settle down. Check that the power supply is not too hot, check that the ASIC chip is not overheating and that the temperature is not too high (for guidelines on optimal temperatures, see above). The Bitaxe must run absolutely stable, then your overclocking was successful.
     
  • Step 4: Proceed as described in step 3. If the hash rate speed drops or stagnates at a certain Mhz selection, then you have to increase the voltage (vCore) by one level. After increasing the voltage, the Bitaxe must work properly.
     
  • Step 5: Step 3 and Step 4 describe your further steps if you want to overclock the Bitaxe further. Always pay attention to the most important parameters: ASIC temperature, hasing rate fluctuations, vCore fluctuations and the heat generated by the power supply. Also note the power consumption, which is given in watts; under no circumstances should this exceed 80% of the capacity of your power supply.
     
  • Step 6: Find the golden mean between voltage and frequency of the ASIC. The goal is to achieve the lowest possible voltage at the highest possible frequency of the ASIC chip. Take your time and be patient to be able to explore and test everything carefully.

Outside of AxeOS specifications

WARNING: From this point on, you must be aware that you can destroy your Bitaxe, power supply or other components by taking the measures described here. Only use it if you are sure and can accept the consequences. We do not provide any guarantees, rights of recourse or warranties regarding the process. You act at your own risk!

Warning!

Power supply for extreme overclocking

As mentioned above, you should create perfect conditions so that your Bitaxe is supplied with optimal voltage of 5 volts. As a rule, all included power supplies are not suitable for normal overclocking measures. For extreme overclocking, a good and powerful power supply is needed that can stably deliver the necessary voltage. 

The power supply should also allow you to adjust the voltage in order to optimally supply the Bitaxe with power after overclocking and to avoid overvoltage or undervoltage. Usually, such power supplies are protected against overload and especially against short circuits, but you need to be familiar with them and pay attention to the pin assignment and specifications of these power supplies. Furthermore, it is essential that a power supply is never loaded above 80%. So pay attention when choosing. Power supplies that work beyond their own parameters can destroy the miner and sooner or later burn out because they are simply overloaded.

For primary overclocking attempts, at least the MEAN WELL LRS-200-5 5V 40A should be used. The MEAN WELL LRS-100-5 AC/DC 18A is not sufficient in this case, for a simple reason, mathematics again. We should expect a maximum load of 50W on the Bitaxe and a maximum of 1.5V voltage, the small Bitaxe won't handle more power anyway due to its non-designed transistors.

The following formula is used for the calculation: 

I = P / U

  • P = Power - 50 Watt
  • U = Voltage - 1.5 volt


If we divide both values, we get the amperage that will pass through the line. In this case 33.33^A. As we have learned, the power supply should not be loaded with more than 80%, at 80% would have 32 amps, so slightly above the allowed. However, this is fine because the Bitaxe can usually be operated stably up to 47 watts at a maximum of 1.45v. That would be 32.41 amps in this case. This is a bit more than the maximum, but it is ok.

Power supply for extreme overclocking

Don't use MEAN WELL LRS-100-5 AC/DC 18A 5V power supply, because it is only approved for up to 18 amps. You will get a higher frequency on the ASIC (1000 Mhz), but the voltage will be unstable and the power supply will be overloaded.

The 300-watt version, the MEAN WELL LRS-300W 5V 60A, is even better and, above all, has sufficient reserves; this can manage 60 amps.

Note that with such extreme overclocking, you will probably only be able to operate one Bitaxe per 200W power supply.

Cooling for extreme overclocking

With this form of overclocking, not only does the ASIC need to be well cooled, which means that you should at least use the “Ice Tower” from 52Pi and Noctua NF-A4x20 5V PWM, but also the underside of the PCB with mosfets. Even better, or significantly better results can of course be achieved with a sufficiently dimensioned cooler made of copper or, as the best alternative to a copper cooler, the “Argon THRML 60mm Radiator Cooler”.

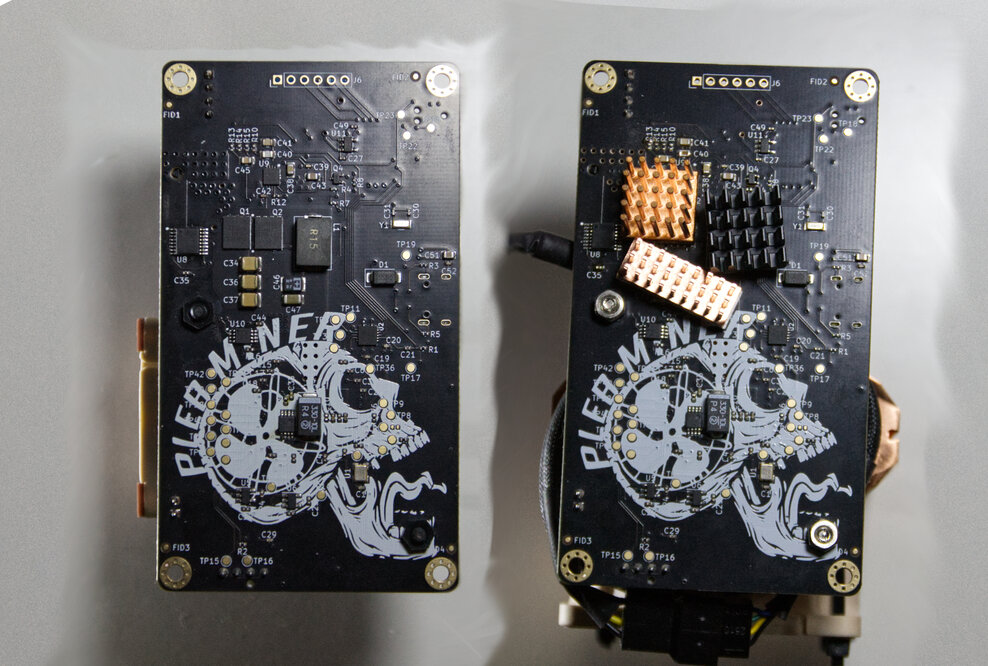
Bitaxe PCB back side

The mosfets on the back of the PCB that get the hottest are Q1 and Q2, as well as the area around the DC plug gets very hot. These mosfets and areas must be equipped with at least an aluminum heat sink, better with a heat sink made of pure copper.

The underside of the Bitaxe must be actively cooled, and there are many solutions available, whether it is a 40mm, 60mm or 80mm fan. It is also important that the fan is directed towards the heat sinks at about 12-23°, and the acceleration of the air flow significantly increases the cooling capacity.

Bitaxe PCB front

ASIC and voltage outside the AxeOS range

Under normal circumstances, it is not possible to set individual clock rates for the ASIC or vCore. This is correct and important so that inexperienced users do not “grill” the Bitaxe. To be able to change the values individually, the following steps must be performed.

Note: Read the basics again, which are listed above, without basics you can destroy your Bitaxe by the following measures.

  • Step 1: Open the Setup menu in the AxeOS of your Bitaxe, with the Chrome or Firefox browser.


  • Step 2: Right-click with the mouse and go to Inspect. An additional window will open on the right side, which you can ignore.


  • Step 3: From a drop-down menu at the frequency and vCore fields, text boxes. In these text boxes, you can enter your desired values and start overclocking.


  • Step 4: Here you have to go very slowly and as mentioned above, go up in 1 step at frequency. With more experience, you can also slowly increase the clock in 10 Mhz steps. However, under no circumstances should you increase it by several dozen or 100 steps.


  • Step 5: Check the temperature, the voltage (must deliver a constant 5V), the heat of the power supply, carefully touch the heat sinks on the mosfets – these must not be so hot that you burn your fingers on them.


  • Step 6: Take more time for this process to find the optimal settings for your Bitaxe. If you have arrived at a maximum frequency, it is recommended to clock down by about 5-10% for safe and stable operation, just as you would reduce the vCore by the corresponding value.

Important: Do everything calmly and carefully. You can get an electric shock or cause a short circuit in addition to the defect of your Bitax. Do everything in a quiet environment and without distractions, concentrate on this process and, if possible, secure your socket/power line with a fuse. Be aware that you are working with live electrical parts here. This is extremely important to know and understand!

The year 2011 is calling

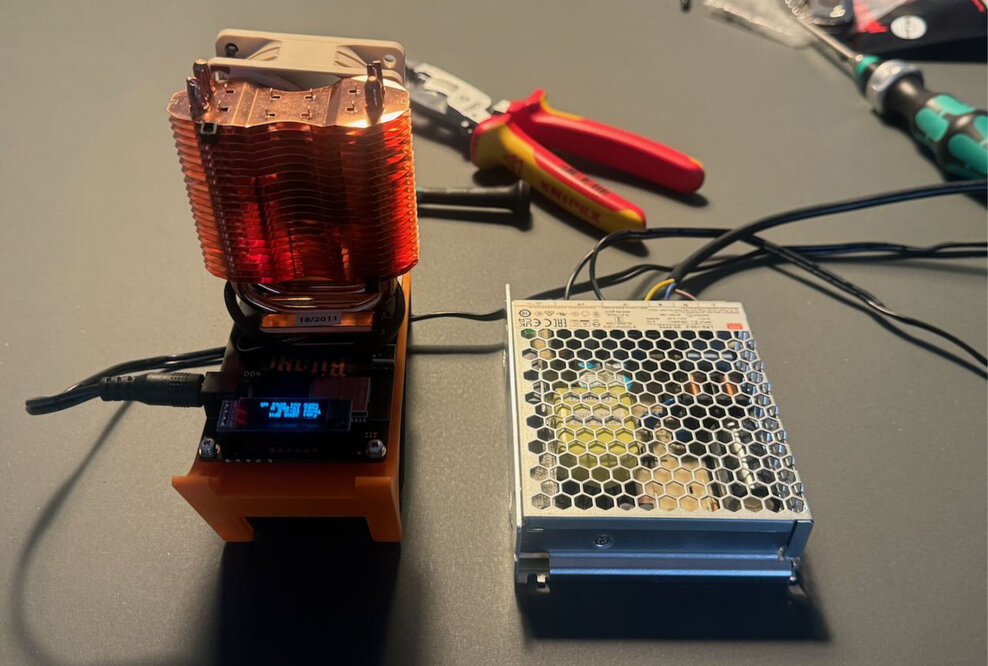
I wanted to tidy up my IT box a bit, and I noticed a cooler that was made entirely of copper, produced between 2008-2011 and designed for use on an emergency bridge of a PC mainboard. In fact, it was also the right size for a Bitaxe and I couldn't help but spontaneously test this monster made of 139.5 grams of copper on the Bitaxe.

The first test surprised me extremely, I was able to run an unoverclocked Bitaxe Supra completely without a fan. In comparison, other Bitaxe Supra, equipped with an “Ice Cooler Tower” and Noctua NF-A4x20 5V PWM, ran at 29°C at 63°C on a very warm day. The copper cooler cooled my miner without any problems, and so the idea was born to overdo it a bit.

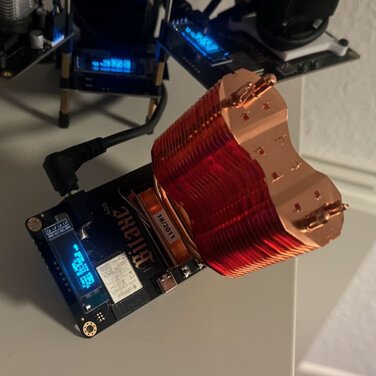
Fanless Bitaxe Supra with cooper cooler

I still had an old Noctua 60mm fan, unfortunately it was designed for 12V and therefore ran very slowly on the 5V Bitaxe. But that was perfectly adequate and it was possible to successfully overclock the ASIC processor to an incredible 800 Mhz at 1,375V.

Bitaxe Supra with cooper cooler

However, I noticed that the MOSFETs on the bottom side of the PCB, Q1 and Q2 to be precise, get extremely hot. So hot that it is simply not healthy to run the Bitaxe Supra at such a high overclocking rate for long periods of time.

So I just took an old 92mm Noctua 12V and put it under the miner. Of course, the two Mosfets Q1 and Q2 were also equipped with a copper cooler so that the enormous waste heat from the small chips could be better dissipated.

Cooling Bitaxe backside

After much deliberation and testing to see what was possible, I came up with the idea of using a fan duct adapter from 120mm to 92mm. The acceleration of the air significantly improved the cooling of the Bitaxe, and the Q1 and Q2 mosfets could no longer overheat. I could even touch them without burning my fingers.

After I was able to eliminate all thermal problems ASIC processor rarely reached 55°C with the monster copper cooler, the MOSFETs were actively cooled with a 120 mm NONAME fan and the coolers were able to dissipate the heat perfectly on the MOSFETs. This opened the way to further progress with the extreme overclocking, which meant a lot of testing with the clock frequency for the ASIC processor and, of course, the voltage itself.

Bitaxe Supra cooling with 120 mm fan duct

"ck pool" was used as the test pool because the statistics were still very detailed at the time and so it was possible to see how stable the miner really was. In the first tests, the Bitaxe Supra was able to achieve a stable 1.2 Th/s without any problems over several hours. It just kept going up, the copper cooler did everything, as did my ugly functional fan duct for the underside, even though the whole construction was on wobbly feet. 

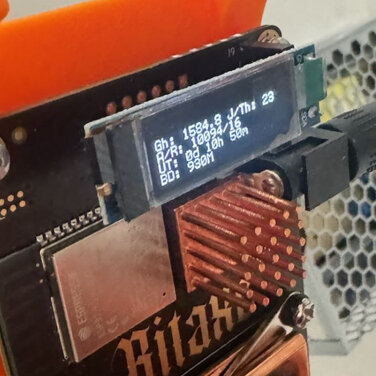
So I achieved a new personal record, running a Bitaxe Supra with air cooling for over 10 hours at 1050 Mhz and a voltage of 1.5v, which resulted in this photo, which many of you already know.

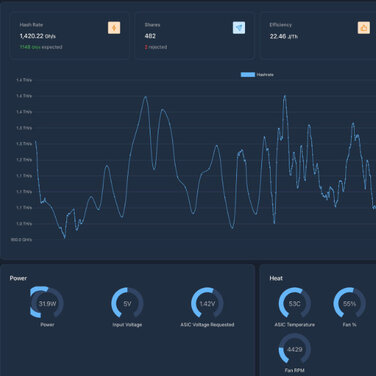
This record day was really very hot, in the study it was 29°C. But the extreme overclocking worked without any problems, relaxed between 1.3-1.7 Th/s, at 45W and an ASIC temperature of 60°C... average hash rate was 1380 Gh/s. Absolutely silent or so quiet that you didn't notice the strange construction.

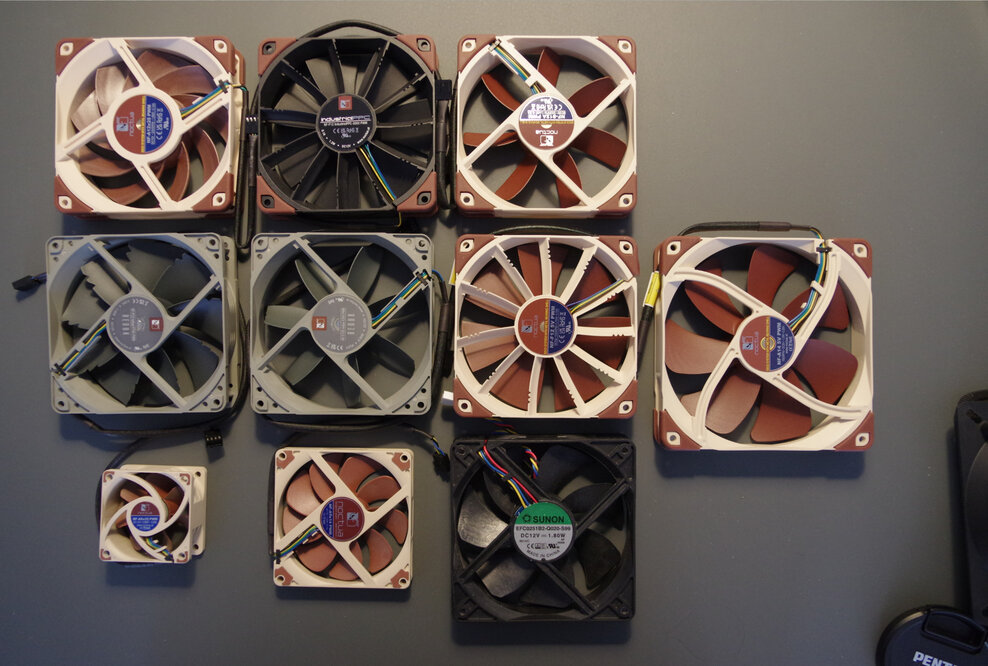
Many Noctua premium fans 120 mm and 140 mm

However, I noticed that the coolers on the underside of the PCB for Q1 and Q2 had become extremely hot again, so hot that it could not have been healthy for continuous operation at these settings in the long run. In addition, the NONAME 120 mm fan, in my opinion, simply did not build up enough pressure and thus could not accelerate the airflow as much as I would have liked.

So a powerful Noctua fan had to be procured, but I found that there are an extremely large number of 120 mm Noctua fans. Each individual model was designed for a specific application and described in detail in diversion articles. But I couldn't tell which fan variant I would need for my test setup. I didn't have a case and other requirements couldn't be determined exactly. So I just ordered all the models that I thought would be useful.

Failures

That's how I got the idea that you could combine two fan ducts. Specifically, the idea was to go from 140 mm to 120 mm, then connect the second fan duct and go from 120 mm to 92 mm.

So I ordered the incredibly great and powerful Noctua NF-A14 5V PWM. The Noctua NF-A14 5V PWM moves an incredible amount of air and accelerates the air through the fan duct incredibly well... Well, I should have done the math in advance, you can't cheat physics and mathematics.

So the first test was started with the two fan ducts and the Noctua NF-A14 5V PWM, and I was very surprised that so little air came through the 92mm fan duct opening, significantly less than with the noname 120 mm fan.It turned out that the air escaped at the slots between the fan and fan ducts, but in this way the air flow was reflected and thrown back by the 92 mm fan duct. Thus, the Noctua NF-A14 5V PWM was working against itself... The explanation is simple: you can't compress the air in such a setup and force it through such an extreme reduction by force. A simple calculation would have solved the problem that such a setup can't work at all.

Here is an example: the 92mm Fun Duct has an opening area of 6,645 mm2, while the 140 mm Fan Duct has 15,366 mm2. This means that the 92 mm opening has only about 43.2% of the area of the 140 mm fan. So the airflow was extremely reduced instead of increased, it was not healthy for the fan in the long run because it simply worked against itself.

So the 120 mm Noctua fans were tested, the 12V version connected to a Mean Well 12V power supply, the 5V version connected directly to the Bitaxe Supra via a Y-splitter.

After a lot of lengthy tests, it became clear that Noctua NF-A12x25 5V PWM was perfect for the construction and produced the best results.

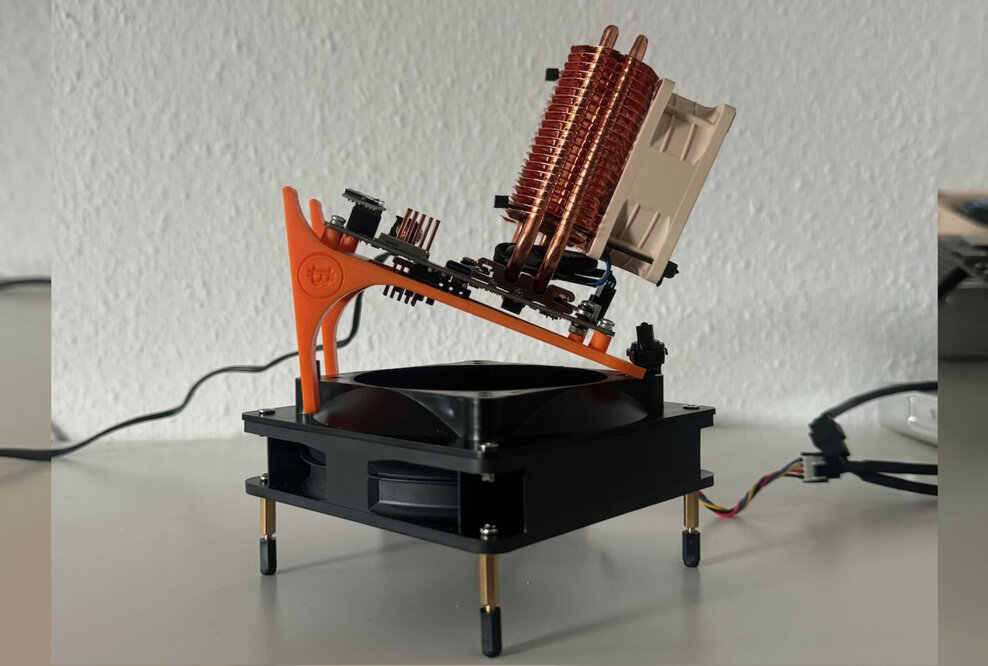
The tests also showed that the Bitaxe should be at a certain angle so that the lower Mosfets are perfectly cooled. I had measured about 32° in my test setup, which will play a role later.

Test results with the provisional construction

Mhz

Voltage

Avg. hash rate

hash rate

J/Th

Power

ASIC Temp.

Fan %

Fan RMPHint

825

1,375


1048,41

29,57

31,0

60

67

3062

1h run

863

1,375


1199,26

27,18

32,6

61

69

3134

1h run

863

1,400


1170,27

27,52

32,2

60

67

3156

24h run

871

1,375

1111

972,9

33,61

32,7

59

65

3035

1h run

902

1,400

1150

953,18

36,93

35,2

60

67

3076

1h run

941

1,400

1200

1028,76

34,99

36,0

57

100

3336

1h run

941

1,425

1200

1133,11

33,09

37,5

57

100

3294

1h run

941

1,445

1200

1402,38

26,67

37,4

62

71

3368

24h run

950

1,450

1212

914,97

43,28

39,6

59

100

3270

1h run

980

1,450

1250

855,29

49,69

42,5

66

80

3335

1h run

980

1,475

1250

1308,62

30,41

39,8

58

63

2723

24h run

980

1,500

1250

1281,81

33,70

43,2

66

80

3302

4h run

1000

1,500

1276

1182,04

37,82

44,7

68

84

3302

1h run

From the idea to the OC'Axe prototype

My simple fan duct design, with the combination of a 120 mm to 92 mm, a very good Noctua NF-A12x25 5V PWM fan and the angled Bitaxe, proved that it is possible to overclock a Bitaxe Supra extremely with the simplest of means. But my setup looked very wild and, for us enthusiasts, possibly nerdy hot, but not really suitable for the living or study room. 

Furthermore, I still had a small problem that the top side of the PCB did not receive any active cooling, or only to a very small extent. The top side, exactly between the ASIC and AC/DC power plug, also became extremely warm, even a copper cooler at that point did not really help.

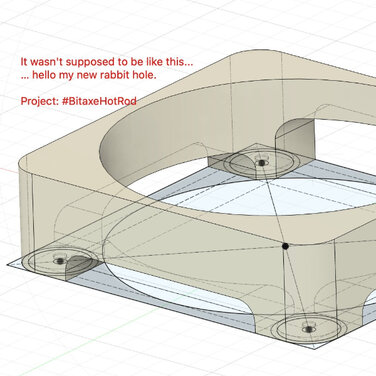
So I thought to myself, I have to construct something for 3D printing, at the same time I can do air/water flow simulations in the CAD program and see if my idea for an OC Bitaxe case would work.

In fact, it was a bit of a challenge to construct a functional but also aesthetic case that was as small as possible. I spent a few days with a pencil and paper sketching out ideas and then discarding them. The basic idea was there, so I got to work on the CAD program...

A digital prototype was developed over several days, and air/water flow simulations were carried out at the same time. It turned out that the Bitaxe should be between 12-23°C from the air flow so that all components are perfectly reached by the air flow and produce as little turbulence as possible. Just over 10 days later, the first model was ready for 3D printing.

First concepts and sketches for OC'axe

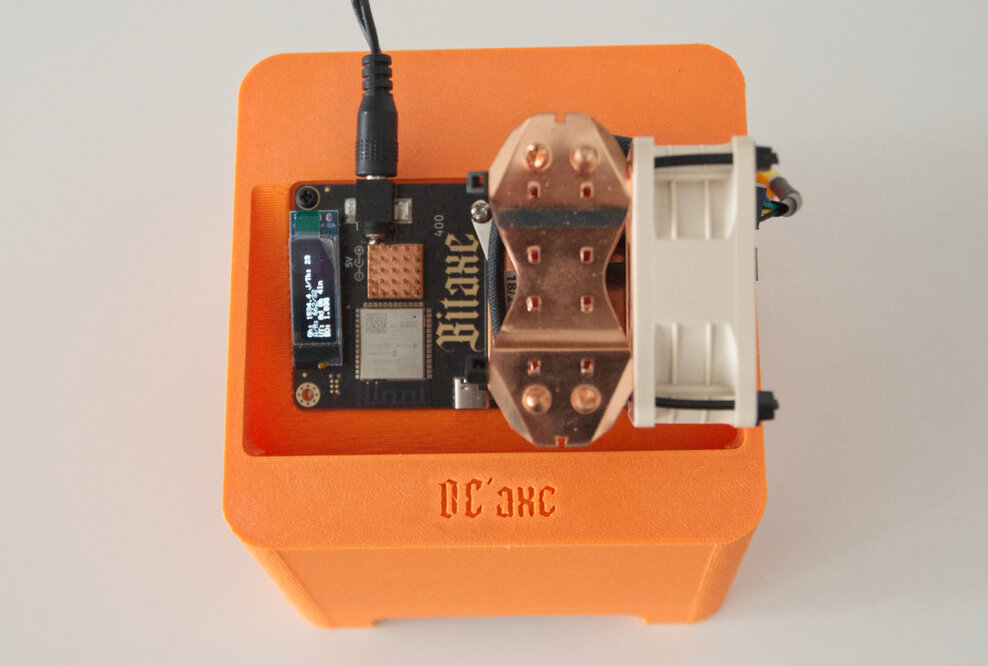
OC'axe in its physical form

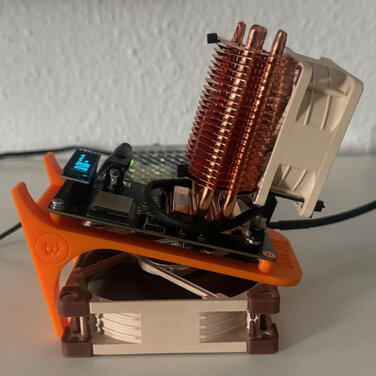
First physical iteration of the OC'Axe

In fact, it is not yet perfect, as the physical test shows, and there were some challenges with 3D printing, as the 3D printing service provider informed me. However, the path has been laid and it continues to move forward with tests and optimizations.

The idea of using O-rings as feet was definitely a good idea, no transmission of vibrations or noise, which is pleasing. The internal air ducts work great and the top side of the PCB is now cooled excellently. The surface of the case is still not optimal, so I still have some work to do on that. But on the whole, the direction is easy to see and the most important thing is that it works, looks good and can be used perfectly in the living/work room.

Results with the OC'axe prototype

Visually, there is still a lot to be done on the prototype. I should slightly adjust the design and coordinate with the 3D service provider. In the current version, the thing really doesn't look very clean, but I suppose that's probably how a prototype should look.

However, the function itself cannot be criticized, the OC'Axe Prototype beats my experimental construction by far, it is not only significantly more compact, but also performs significantly better.

I have not tested all of them between overclocking, as listed above for the experimental construction with the Fan Duct... I tried to squeeze the maximum out of my Bitaxe Supra right away.

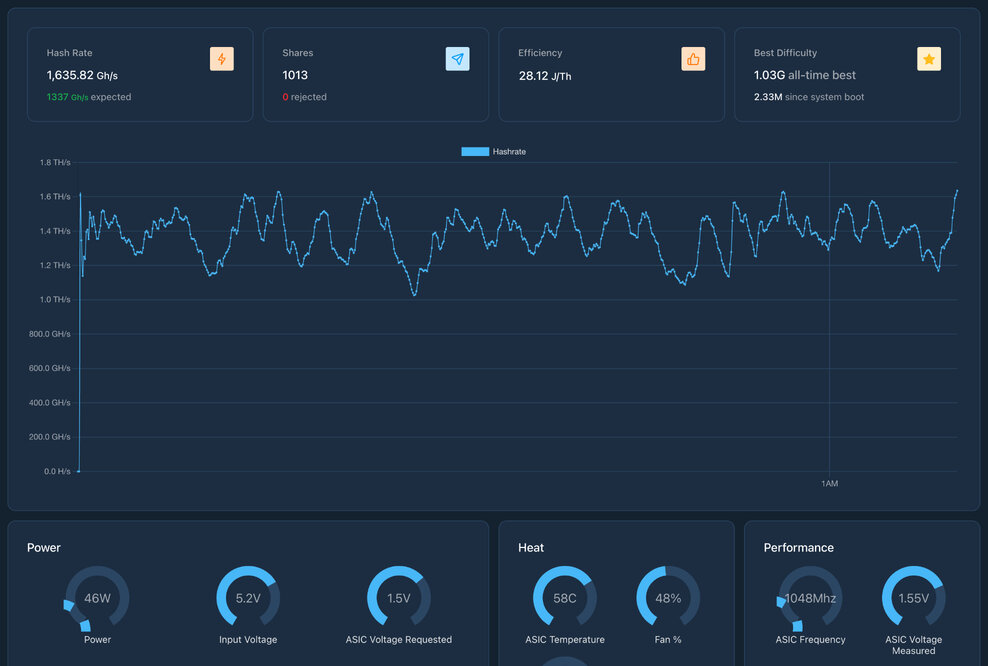
I connected it blindly and let the test setup run for an hour, as can be seen on X.com, at 1000 Mhz and 1.5v voltage, on average it managed 1250 Gh/s. It was almost silent, 1 meter away from the test setup and you simply couldn't hear the fans anymore.

With my further test, I came to the optimal value:

Mhz

Voltage

Avg. hash rate

Gem.

J/Th

Power

ASIC Temp.

Fan %

Fan RMP

Hint

1048

1,500

1337

1628,34

27,57

44,9

54

48

1416

1h run

Average hash rate was at 1356 Gh/s, so more than perfect. The temperature is also totally relaxed: 54°C at the ASIC, I could touch the Mosfets problem-free with my finger and it didn't even get uncomfortable. So functionally the prototype is a complete success..

Bitaxe air cooled extreme overclock wit 1.6 Th/s

After an hour of runtime, the "ck pool" automatically assigned a share difficulty value of 1080, with 1,013 shares and exactly 0 rejects. This means to me that the extreme overclocking is very stable and gives you high-quality shares.

Sweet spot: of course you don't have to run the Bitaxe to the limit, a good 10% down and you still have over 1.2 Th/s, lower power consumption, a significantly longer lifespan because neither the ASIC nor the mosfets can overheat. Even for very warm regions, OC'axe is suitable, the miner is guaranteed not to shut down due to overheating. 

So far, a complete success. Now just the aesthetics and the visual in nice and smooth.

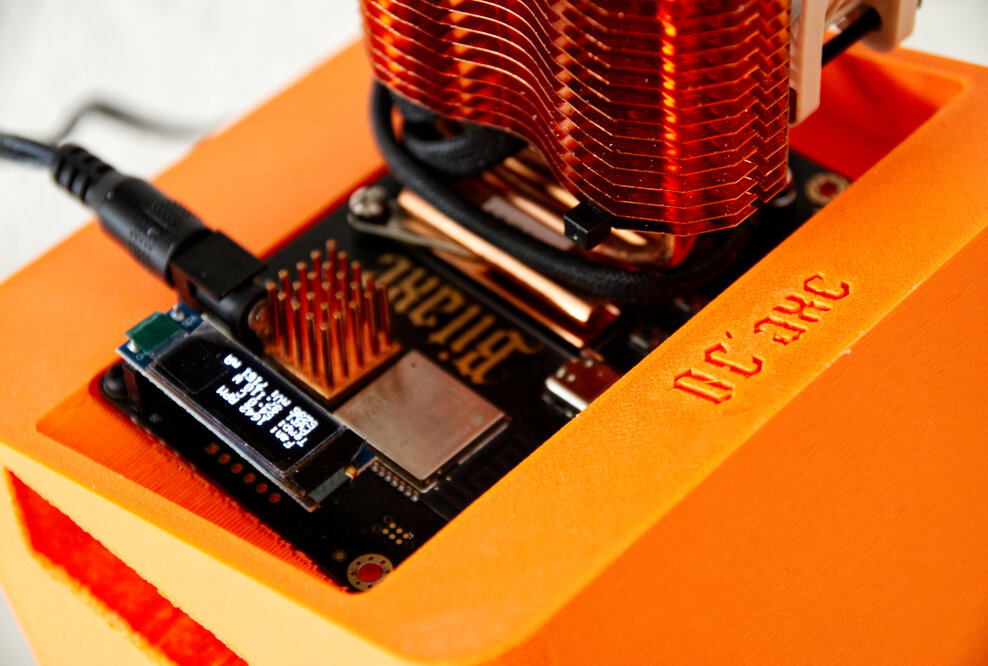
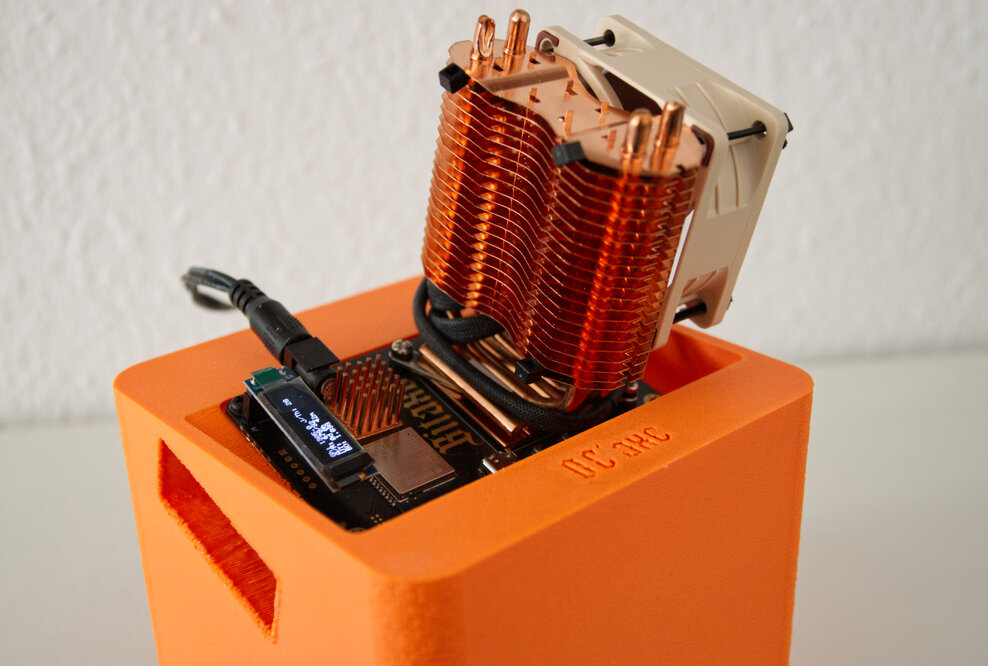
OC'axe impressions

The development of the OC'axe continues. It is described in detail in a separate article, as there is unfortunately no more space here in this article. 

But a few impressions can still be shown. 

Many thanks to the entire Bitaxe community, who are finding new solutions with so much enthusiasm and fun and I can be a part of it. 
 

So the journey continues...

Contact
Andreas
Founder

Interested in digital progress, alternatives in finance, Bitcoin mining processes, in particular open source developments.

similar journal's