OC'axe

Manufacturer

NerdQaxe++ evolution or a psychedelic voodoo experience


22. April 2025, 04:50
Germany
Analysis

It's amazing how quickly development is progressing. The day before yesterday, we had a Bitaxe Ultra and celebrated, only to be replaced by the Supra. NERDQaxe+ based on the BM1368 was released. 

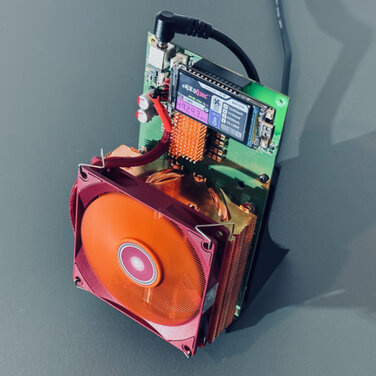
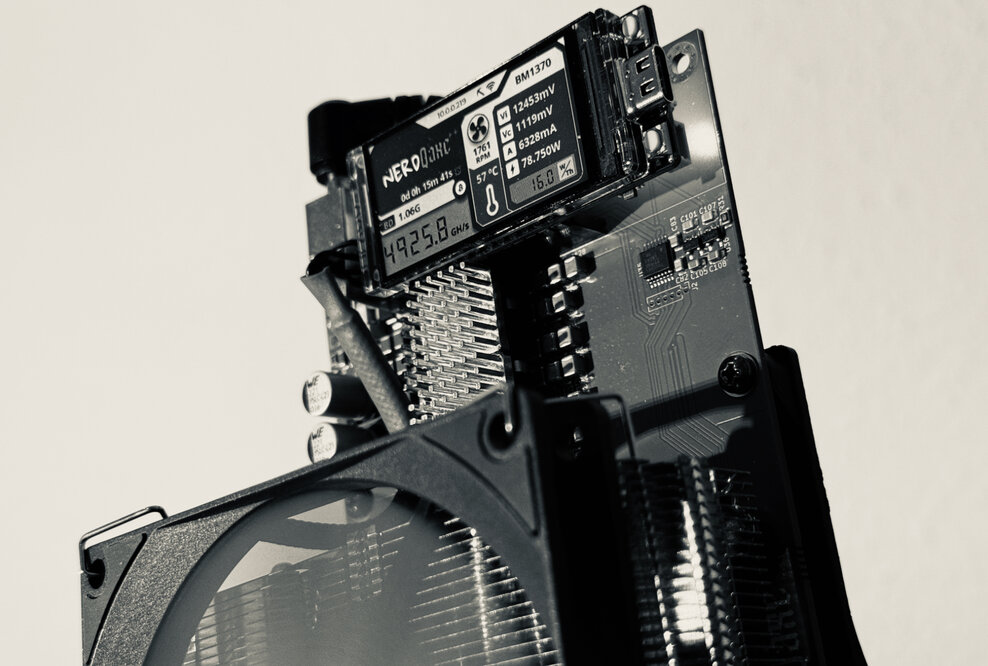
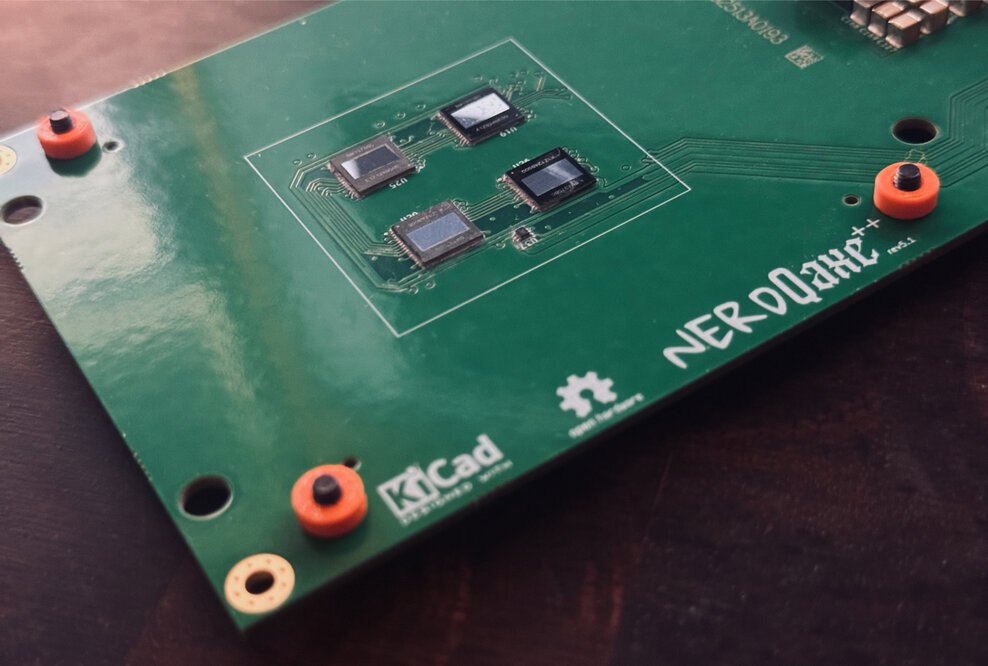
NERDQaxe++ PCB with 4 x BM1370 ASIC processors

This was followed by the Bitaxe Gamma, which is simply incredible in its performance and often sold out. So it's only logical that a new multichip offshoot in the form of a NERDQaxe++ with the BM1370 ASIC is coming. With simply brutal performance in the smallest space.

Compared to the NERDQaxe+ (4x ASIC BM1368), the PCB has grown slightly, as more technology simply requires more space. The NERDQaxe++ is based on four ASIC processors from the BM1370 generation. These ASIC processors are used in the Industrial Miner S21 Pro product series, where they also impress with their incredible speed and efficiency.

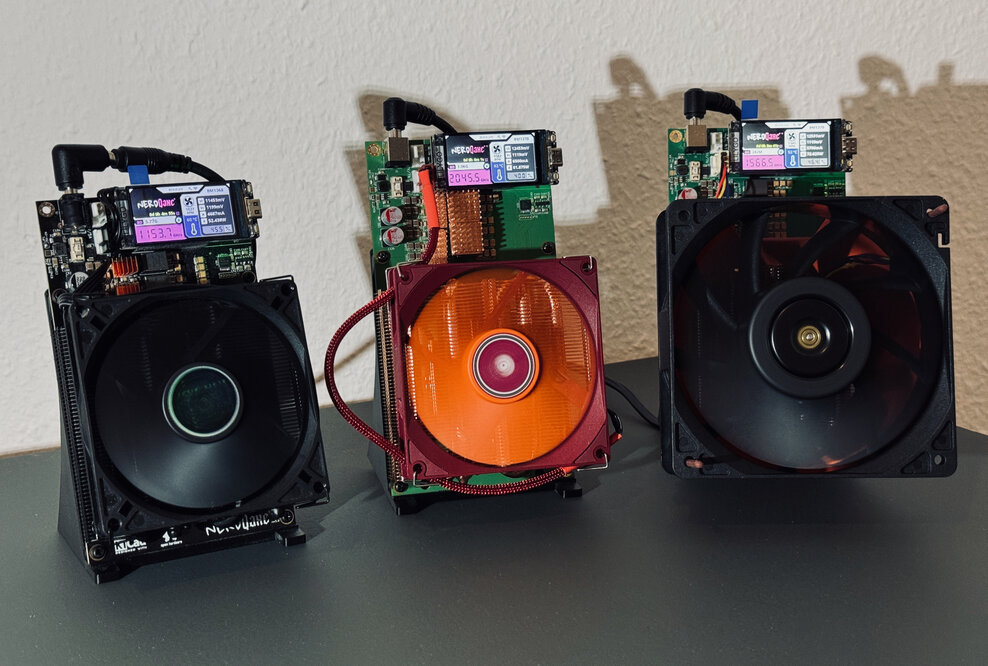
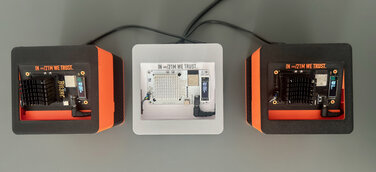
NERDQaxe+ and NERDQaxe++

The NQ++ is special in many ways: it is the first home miner with very low power consumption that easily achieves around 5 TH/s. The eye-catching display is particularly impressive, offering a wealth of information and simply looking great. And all of this as open source.

A big thank you also goes to the developer @Pmaxsd – without him, we wouldn't have PiAxe, QAxe, NerdQaxe+/++ and much more.

Availability

The NQ++ was offered worldwide for the first time by PowerMining, and the first batch sold out completely within a few hours/days. This is not surprising, as never before has there been so much hash rate in such a small space at such an affordable price. Within a very short time, PowerMining has not only become an extremely affordable seller, but also the largest manufacturer in Europe – and one that simply impresses in many areas.

NERDQaxe++

The build quality is really perfect; all my tests, especially in extreme overclocking, were carried out with PowerMining devices. Worldwide and fast shipping leaves nothing to be desired, and the support team is quick and friendly if you have any problems.

Speaking of price: with the code “OCaxe,” you can save 10% on your entire order at PowerMining. So if you don't want to miss out on the May batch of the NERDQaxe++, now is your chance.

Preface

But back to the marvel that is the NQ++. It was delivered with a sufficiently dimensioned 120W power supply, which is absolutely sufficient for operation with default settings... although I do have one small criticism here, but more on that later.

The small, although not that small, NQ++ is pleasantly sized and bursting with technology when you unpack it. Four BM1370 ASIC processors, a 6-layer PCB, and a fuse rated for 8 amps clearly show that this is a next-generation device that is ready to increase the hash rate without compromise.

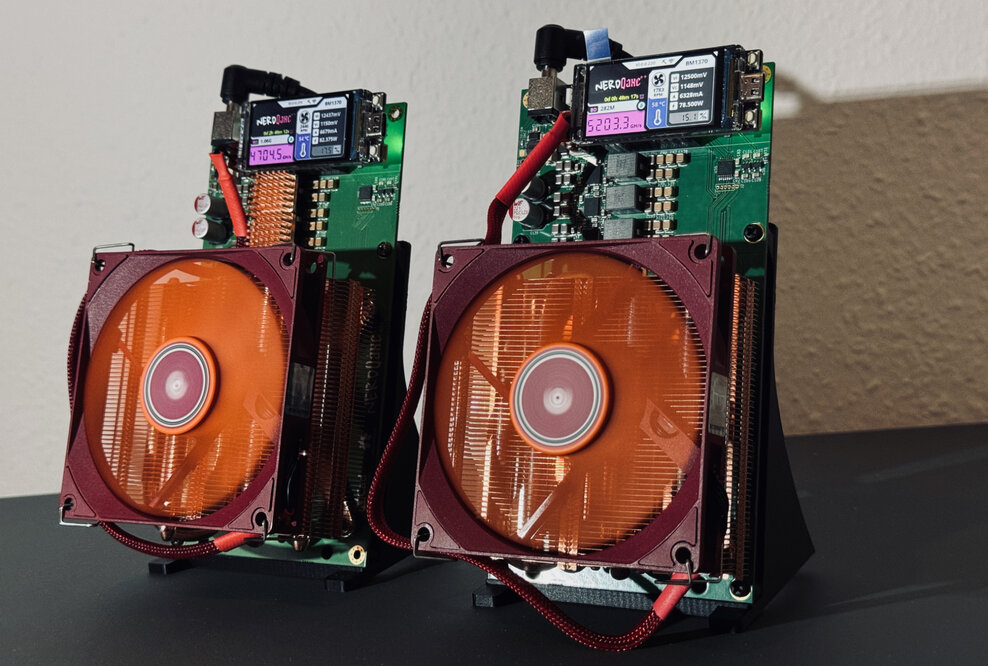
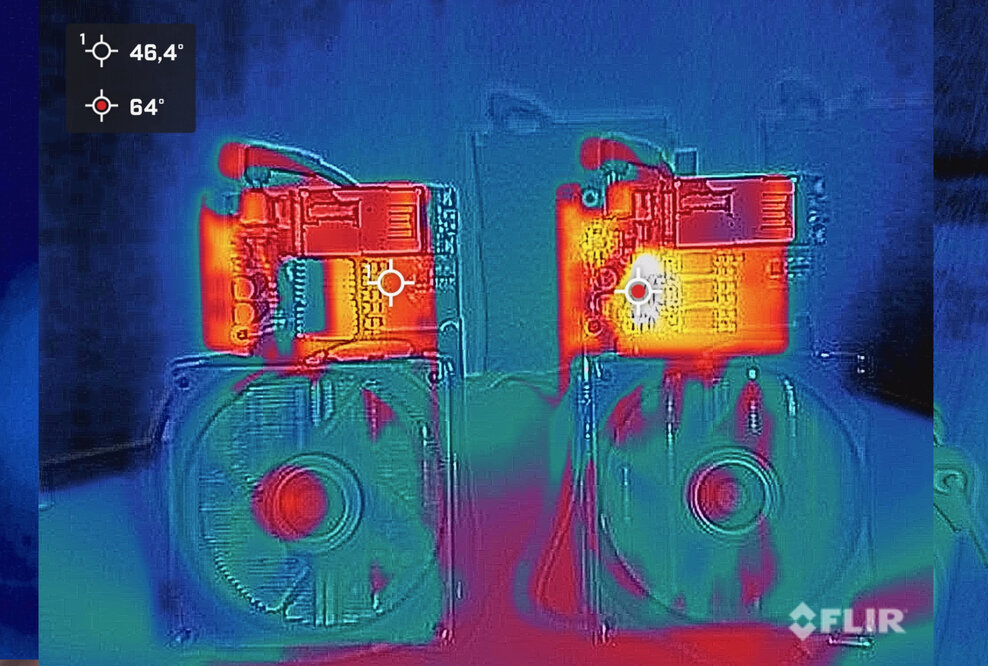
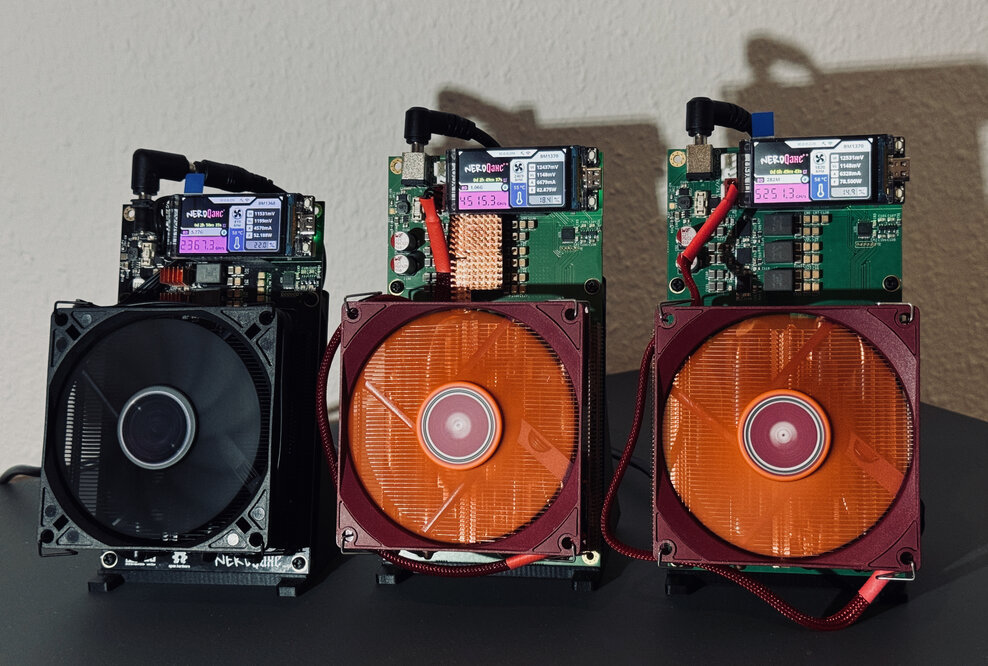
Two NERDQaxe++ with cooper cooler AXP90-X47 and AXP90-X53

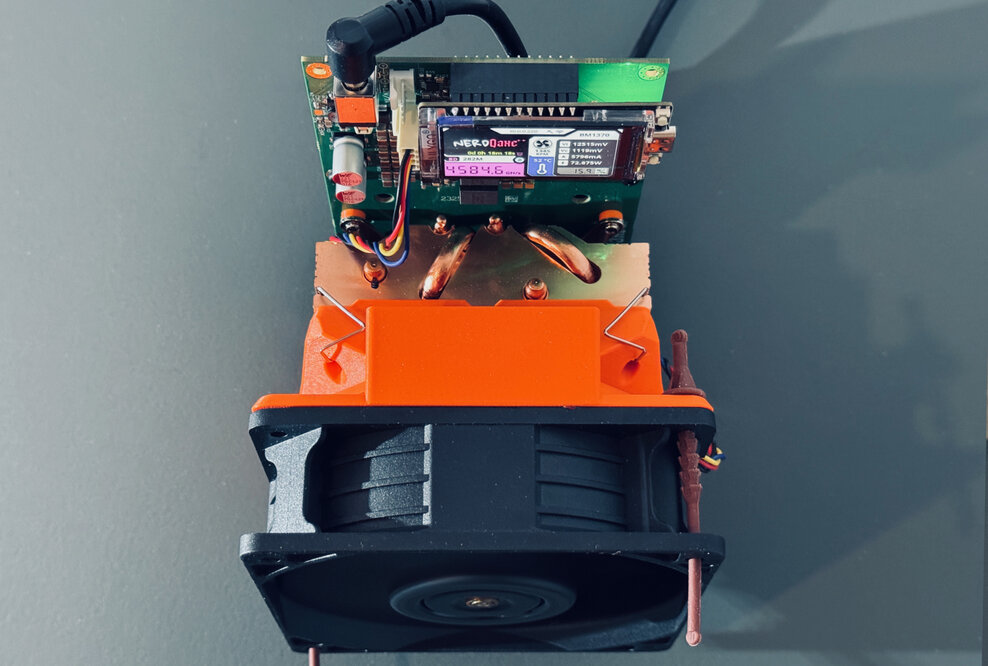
The 4-color display familiar from the Nerdaxe and NERDQaxe+ has the same functions, with different parameters displayed on four sides. The four powerful ASIC BM1370 processors are cooled by the Thermalright AXP90-X36 and a 92mm fan, which is virtually silent. This is a clear advantage if you have space for a good, large cooler on the PCB and, above all, a 12v system, which significantly expands the choice of fans.

For my tests, I always use a Mean Well power supply because I know that I am on the safe side. With plug-in power supplies, you never know how good the quality is, and the voltage cannot be adjusted.

Correct power supply

In my naivety, or rather because I didn't think about it, I connected the NQ++ to the same Mean Well LSR-150-12 as the NQ+. The power supply has a rated output of 150W with an efficiency of 87.5%, which definitely makes it one of the absolute premium power supplies. If we now calculate the maximum possible load at the above-mentioned efficiency, it would correspond to 131.25 watts (150W x 0.875).

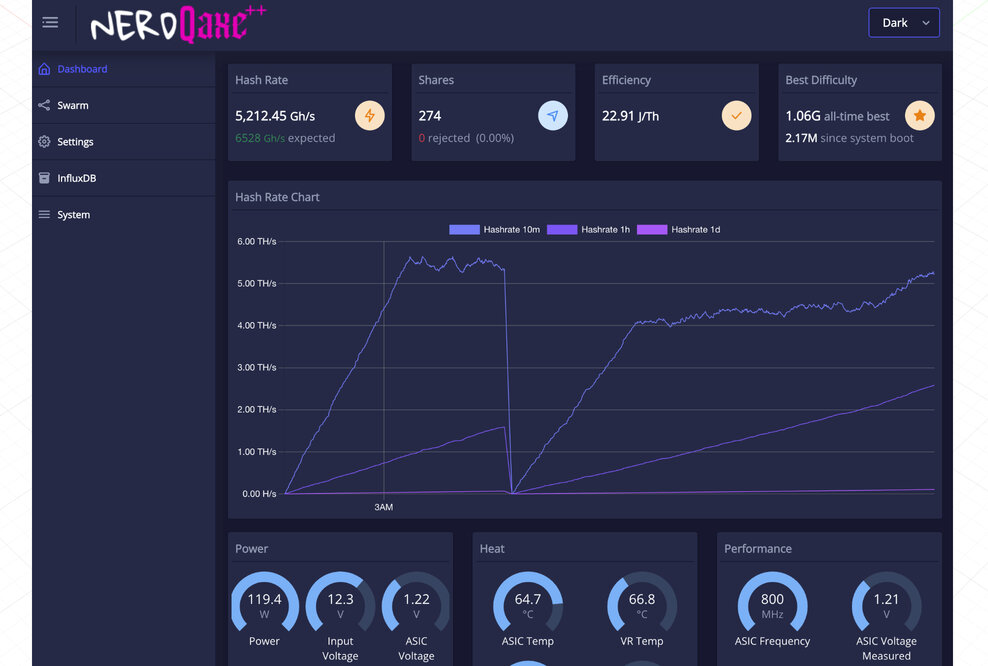
Via the UI, you can clearly see that the NQ+ and NQ++ consume around 130 W together under standard settings. The NQ+ is at 55.6W and the NQ++ at 74.3W. This combination ran for about two hours, during which I tested the NQ++, adjusted it, and checked that everything was running smoothly. After these two hours, I wanted to perform the same tests with the supplied 120W power supply, so without thinking twice, I touched the Mean Well power supply and burned my hand. I have never seen a Mean Well this hot in my life...

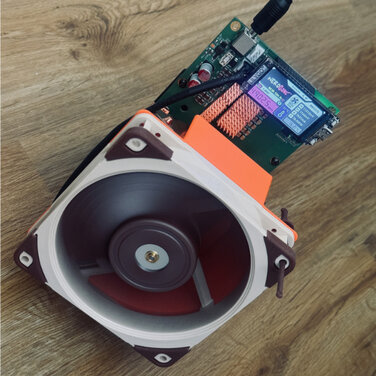
NERDQaxe++ with 120mm Noctua fan and NQ Helix shroud

It was immediately clear to me that the power supply was running at its limit and definitely not at 129.9 W.

I had to check this more closely, so I connected the NQ++ to a Shelly Plus Plug S smart socket and found what I had feared. The 74,3W displayed in the NQ++ UI was measured at 88.7W, and the same result was also found with the NQ+. So my Mean Well was running at around 155,7 W at its absolute maximum, showing me once again how good the quality of these power supplies is. Not only are they adjustable and extremely efficient, they also have overvoltage and short-circuit protection.

And now we come to the included 120W power supply, and apply the 80% rule of total load, hoping that this power supply really has an efficiency of 80%. The power supply can therefore deliver 96W, which sounds good at first. However, when we think back to the measurement with the Shelly Plus Plug S and I have already seen peaks of up to 97W, it quickly becomes clear that this power supply is definitely too weak. In any case, it explains why it gets so warm, and we're not even talking about overclocking here.

NERDQaxe+ with BM1368 and NERDQaxe++ with BM1370 and cooper cooler
 

RATED POWER

RATED CURRENT

EFFICIENCY

Maximum workload

VOLTAGE ADJ. RANGE

Mean Well LRS-150-12

150 W

12.5 A

87.5 %

131.25 W

10.2 ~ 13.8V

Mean Well LRS-200-12

204 W

17 A

87.5%

178.5 W

10.2 ~ 13.8V

Mean Well LRS-350-12

348 W

29 A

85.0 %

295.8 W

10.2 ~ 13.8V

My absolute recommendation here would be to buy and use a Mean Well power supply unit with a minimum of 150W; anything else is just a temporary solution.

Recommendation: You should definitely use a high-quality Mean Well power supply, especially because the NQ++ consumes a lot of power and you want to operate this home miner safely at home. In my opinion, the Mean Well LRS-150-12 is the absolute minimum, but it's better to play it safe with the LRS-200-12. This is especially true if you want to overclock a little later, but more on that later.

The correct cross-section and quality of the power cables is also essential; it MUST be at least 16 AWG. I searched extensively and found a really good 90° DC cable, GINTOOYUN 5.5mm x 2.5mm. It has a cross-section of 1.5mm and can be loaded up to a maximum of 180W, which is important, and not just for overclocking.

Overclocking

NERDQaxe++ with NQ Helix shroud and 7500 RPM industrial fan

Overclocking the NQ++ is a very tempting prospect, even for me, especially to really get the most out of it and increase the hash rate. What can be done without hesitation on a Bitaxe is a slightly different story with the NQ++.

As you will see in the test series, we definitely need a different and more powerful power supply. The 120W power supply, which is probably what most retailers will deliver, is already at its limit with the default settings of the NQ++ – and in some cases even overloaded.

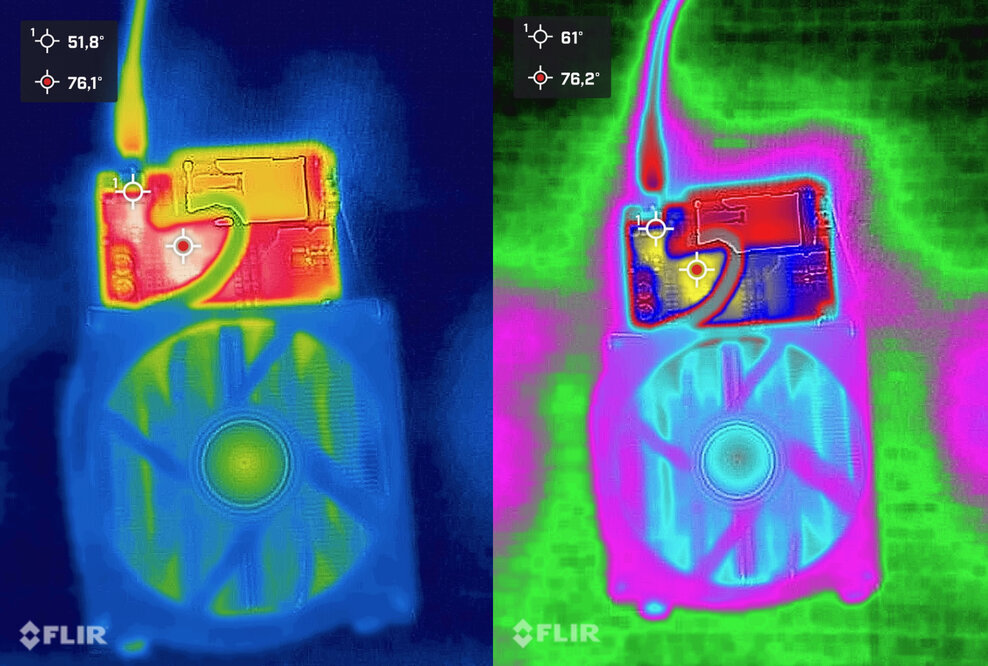
Furthermore, we still have the issue with the VREGs, of which there are more on the NQ++ than was the case with the NQ+. They already heat up to 80°C with the default settings... The solution here seems obvious: just stick on a few heat sinks, preferably made of copper. At least, that's what we always did with the NQ+ and the Bitaxe Gamma. But, to my surprise, the VREGs needed a significant increase in temperature. A NQ-Helix Shroud with a 120mm fan was already used in the test, and the VREGs were thus cooled directly with targeted airflow.

Thermal images showing hot spots on the NERDQaxe++

I couldn't explain this at first, but then it made sense. The number of VREGs and the installation of the copper coolers created thermal insulation... The hot air cannot be removed quickly enough from the VREGs because there is simply too much heat for such a small area.

So coolers are actually counterproductive in this location, as a test clearly shows. The NQ-Helix shroud was used with an NF-A12x25 PWM fan set to 100%, with default settings of 600 MHz at 1,150 mV. An AXP90-X53 Full was used as the cooler.

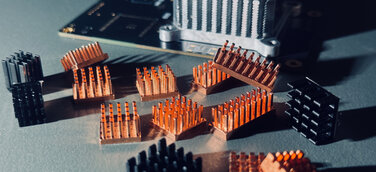
NERDQaxe++ with cooper heat sinks on VREGs
 

Power 
W/UI

Power 
W/Smartmeter

ASIC temp °C

V. Reg temp °C

With copper heat sink

78,5

87,5

50,4

45,5

Without copper heat sink

78,6

88,2

48,3

42,4

And yes, I tried different clock speeds and fans, but the result remained the same: the VREG temperature was always up to 7°C higher than without the copper heat sink. It was also observed that the ASIC temperature rose naturally. We have observed this behavior very often with the Bitaxe Gamma as well: the warmer the VREGs get, the warmer the ASIC gets, more power is consumed and therefore more cooling is required... a devilish cycle.

Thermal images showing hot spots on the NERDQaxe++, with copper heat sinks and NQ Helix shroud

It is therefore clear that more thought needs to be given to overclocking the NQ++. It won't fail due to ASIC overheating, because the AXP90-X36 is already a very good cooler, even the standard fan is fine. However, it will definitely fail due to VREG temperature or the power supply itself. And if you replace the power supply with a good Mean Well, you must also take into account that good, high-quality power cables must be used.

Underclocking & undervolting

NERDQaxe++, with copper heat sinks and cooper ASIC cooler

Everyone is talking about how high they can overclock the NQ++, what settings they need to use, and what they need to use.

But I see the strength of multi-chip miners clearly elsewhere: more stable and, in some cases, silent operation, significantly longer hardware life, and phenomenal efficiency are just a few of the points that need to be mentioned. Underclocking and undervolting are completely ignored... But that's exactly what the big, well-known miners have been doing for a long time. Hardware is a one-time purchase, you want it to work for a long time without breaking, and this is exactly where the NQ++ can play to its full advantage as a multi-ASIC home miner.

For just under 70W, you get a little over 4 TH/s. When you consider that you have to spend up to 25W more for just 800 Gh/s, that's a clear argument for running the NerdQaxe++ in this mode, even with default values. But let's see what the test results say.

Thermal images showing hot spots on the NERDQaxe++, with copper heat sinks

The new PID feature in the recently released firmware version 1.0.29 is a milestone on so many levels. With the PID function, you simply set the desired temperature of the ASIC processor in the settings, and the software does the rest, creating an absolutely quiet, often even silent, powerhouse in a home miner – which now truly deserves the name home miner.

However, the PID function not only takes the ASIC temperature into account, but also the VREG temperature – which is known to be significantly more relevant since the release of miners based on BM1370 ASIC processors. Depending on which component reaches the set target temperature first, the fan is automatically adjusted to maintain this temperature.

It also doesn't cause the fuses to blow, which happened quite often with the NERDQaxe+ and NERDQaxe++ when using the auto fan control. Between you and me, it never really worked well, so the recommendation was always to set the fan manually to about 55%.

But back to underclocking, what makes sense? Of course, it's up to each individual to decide for themselves. I really wanted to reach the magic limit of approx. 4TH/s (4039 Gh/s ). So I decided on 495 MHz and a core voltage of 1085v in combination with the new PID feature with the aim of achieving a temperature of 60°C.

Cooler

The NQ++ comes standard with an AXP90-X36 cooler and the standard fan, which is more than enough for normal operation. The geometry and mass of the Thermalright cooler are truly excellent.

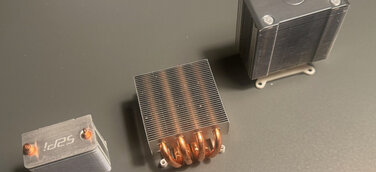
However, there are other versions of this cooler available, in addition to the standard aluminum cooler, which is slightly larger and goes by the name AXP90-X47. There are two more copper versions, the AXP90-X47 Full and AXP90-X53 Full. The AXP90-X53 is a real monster, weighing in at 520 grams. The first number refers to the model and fan size, meaning it is compatible with all 92 mm fans that are 14 mm high. The second number is the height of the cooler, whereby the AXP90-X36 is not only narrower but also slightly shorter. The AXP90-X47 has a height of 47 mm, while the AXP-X53 is 53 mm high.

Until now, it has always been the case that more mass and more copper have resulted in significantly better cooling performance. But in fact, the height of the coolers on the NQ++ is really extremely important. This is probably the first time I've said here that “more isn't always better” – this is due to the VREGs, which get extremely hot. The higher the coolers, the weaker the airflow that hits the hot VREGs to cool them down. But more on that later in the test results.


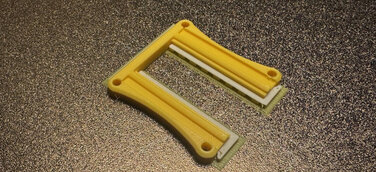
Oh, and if you've ever replaced a cooler on the NerdQaxe+ or NerdQaxe++ and didn't have a rear bracket, you know how difficult installation can be. You end up swearing a lot, twisting or breaking your fingers. So, I took a pragmatic approach and designed four washers to make installation easier. These allow you to easily pre-assemble the mounting screws on the PCB. Then installing the cooler is really a piece of cake. I also optimized the height of the washers to create even better contact pressure on the ASIC. They were also designed a bit wider so that the cooler can bite into the PCB properly with the brackets.

Cooling spacer for perfect contact pressure on the ASIC

In addition, this gives you the option of playing with colors, depending on the filament... But always remember to print these washers with PETG at least (ASA/ABS would be better). You can download the model for free on MakerWorld and, as always, it is free for plebs to use, but sale is prohibited.

AXP90-X cooler in variants X36, X47 Full, and X53 Full.

NameMaterialWeightDimensions (L/W/H)Thermal Power Capability
Thermalright AXP90-X36

aluminum/copper nickel socket

230 g

94.5 x 95 x 21

95 W

Thermalright AXP90-X47 Full

copper

460 g

94.5 x 95 x 32

145 W

Thermalright AXP90-X53 Full

copper

540 g

94.5 x 95 x 38

165 W

The naming is somewhat confusing; one might think that the number after the X indicates the actual height of the heat sink. However, Thermalright has employed a trick here, following the motto “more is more” – which is incorrect. The height of the cooler is always specified together with the included fan, which is 15 mm high. So when we talk about an X53, we are only referring to a cooler with a height of 38 mm.

Fans

All three coolers were tested with the standard Thermalright fan, which is supplied as standard. In addition to this fan, I also carried out tests with a Noctua NF-A9x14... But beware, this is probably not widely known. Noctua sells these fans separately, but they are also included with the Noctua NH-L9i cooler set. What has Noctua come up with here? That's right, a significantly more powerful model is sold with the Noctua NH-L9i cooler set – which unfortunately cannot be purchased separately.

But see for yourself:

Different Noctua A9x14 fan models


RPM

Amp

Watt

NF-A9x14 (only in set)

2500 RPM

0.21A

2.25W

NF-A9x14 (solo)

2200 RPM

0.11A

1.32W

Of course, we tested with the more powerful model so that we could measure the best possible performance with 92 mm fans. As mentioned above, cooling the four ASIC BM1370s is not a major problem, even with the standard AXP90-X36 cooler.

The real issue is the VREGs, which are located at the top of the board and distributed around the DC plug. Even in normal operation with default settings, these become extremely hot; at times, I was able to measure temperatures of up to 80°C with a thermal camera. Active cooling is therefore definitely necessary here, and unfortunately, the 92mm fans do not have enough surface area to transport even a little air to the VREGs.

For this reason, I designed a 120 -> 92 mm shroud, but not just a shroud, I also incorporated the geometry of an accelerating helix. Furthermore, a precisely calculated recess was created at an optimal angle so that a 120mm fan can also transport air directly to the VREGs. The results are, for the most part, simply phenomenal. 

In my opinion, the NQ-Helix shroud is an absolute must-have accessory.

For this reason, I was also able to mount several 120 mm fans on the NQ++ and test them in detail.

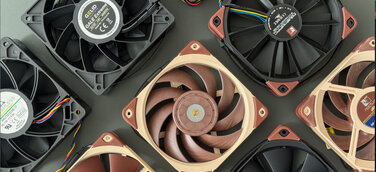
Fan candidates

Name

RPM

CFM

dB(A)

static pressure 
mmH2O

Thermalright TL-9015B

2700

42.58

22.4

1.33

Noctua NF-A9x14 (set version)

2500

57,5

23,6

2,11

Noctua NF-F12 iPPC 3000 PWM

3000

186,7

43,5

7,63

Noctua NF-A12x25 PWM

2000

102,1

22,6

2,34

Noctua NF-F12 PWM

1500

93,4

22,4

2,61

Bewinner

7500


70


Based on my article "OC'axe: let the wind chimes begin", the winners for operation in the OC'axe have been clearly identified. For maximum cooling performance, but somewhat louder, the Noctua NF-F12 iPPC 3000 PWM was the first choice, with the Noctua NF-A12x25 PWM coming in second, offering only marginally worse cooling performance but significantly quieter. Unfortunately, the Noctua NF-F12 PWM failed the test for its intended purpose. However, when operating the NQ++, the cards are actually reshuffled.

To exaggerate it even more, the “small” Bewinner 7500 RPM fan was tested again in combination with a NQ-Helix shroud to see what was really possible – and I was extremely surprised.

Test Environment

To ensure that the test series were as accurate as possible, testing was always carried out on the same NQ++, with an ambient temperature of 23°C. New Thermal Grizzly Kryonaut Extreme thermal paste was applied to all three coolers. The latest 1.0.29 firmware with the new PID feature (must-have feature) was used. To ensure optimal power supply, as mentioned above, the Mean Well LRS-150-12 was used, which is truly the optimal choice for an NQ++. 

Experience has shown that the NERDQaxe+ and NERDQaxe++ require a certain amount of time to reach their maximum hash rate. Therefore, the tests actually took longer than usual with a Bitaxe.

For this reason, we waited until the hash rate ramping was complete, and the test run time per fan/cooler combination was then 30 minutes.

To ensure that ping times for pulling are as short as possible and that you are not dependent on fluctuations from your internet provider or pool provider, I ran the tests and benchmarks on my local node under Umbrel on an RPi 5 on the public pool.

Test results

This time, I have made a greater effort to demonstrate as comprehensively and transparently as possible what the NQ++ is capable of, with which cooler and fan combinations, and, above all, taking into account the new PID feature. This also highlights the potential of PID and underclocking and undervolting, which, in my opinion, is significantly more important than simply overclocking this beautiful piece of hardware.

The new PID feature should therefore not only measure cooling and consumption performance, but also the actual noise level. I know that the perception of noise is always very relative and individual. However, I have to say that I generally find anything that makes a perceptible noise to be “loud.” For this reason, I often accept a loss of performance just so that it can be operated quietly or silently – nothing is more annoying than a howling cube.

NERDQaxe++ with AXP90-X53 NQ Helix shroud and 7500 RPM fan

I have come up with a simple system here, because dbA specifications make it difficult for many people to understand whether the fan is really loud, quiet, or emitting an annoying frequency. I tried to do the hearing tests from a distance of about 1 meter, but even the quietest setups were not audible from a distance of 10 cm.

Noise level table.


+

loud, clearly audible and rather unpleasant 
   

++

quiet, but still clearly audible 
   

+++

very quiet, barely audible, almost perfect 
   

++++

extremely quiet, to absolutely silent 

The power consumption was not only read in the UI, but the actual power consumption was also measured. Many power consumers are not taken into account in the UI, which leads to the incorrect information that the home miner consumes significantly less power than is actually the case. If you didn't already know, the fan consumption, for example, is not measured at all, just like many other components... You will notice this particularly with the tests using the 38 mm 7500 RPM fan, which shows how much power is actually being consumed.

Tests with default values

The default setting for the NQ++ is 600 MHz at a voltage of 1,150 mV. Even at these relatively low values, the NQ++ achieves an incredible 4.8 Th/s (4,896 Gh/s). Considering how small the home miner actually is, these are incredible hash rate values.

Thermalright AXP90-X36

FanPower W/UIPower W/SmartmeterASIC Temp °CV. Reg Temp °C
Thermalright TL-9015B

77,4

86,7

53,8

52,2

Noctua NF-A9x14

75,6

86,3

49,6

43,9

Noctua NF-A12x25 PWM

75,9

96,6

49,6

39,8

Noctua NF-F12 iPPC 3000 PWM

74,6

93,3

43,8

33,7

Noctua NF-F12 PWM

78,9

93,3

54,2

44,2

Bewinner 7500 RPM

75,3

139,9

46,6

33,3


Thermalright AXP90-X47 Full

FanPower W/UIPower W/SmartmeterASIC Temp °CV. Reg Temp °C
Thermalright TL-9015B

74,5

94,0

47,1

46,3

Noctua NF-A9x14

74,5

88,3

48,7

48,6

Noctua NF-A12x25 PWM

75,8

88,9

50,8

42,5

Noctua NF-F12 iPPC 3000 PWM

74,6

89,0

46,8

38,1

Noctua NF-F12 PWM

76,3

87,8

51,6

43,3

Bewinner 7500 RPM

74,1

136,6

43,8

34,1


Thermalright AXP90-X53 Full

FanPower W/UIPower W/SmartmeterASIC Temp °CV. Reg Temp °C
Thermalright TL-9015B

79,9

88,7

49,3

56,7

Noctua NF-A9x14

79,5

88,2

50,6

60,1

Noctua NF-A12x25 PWM

79,5

88,3

50,4

45,5

Noctua NF-F12 iPPC 3000 PWM

79,1

90,3

43,3

36,9

Noctua NF-F12 PWM

80,4

94,0

50,3

45,1

Bewinner 7500 RPM

76,0

139,8

38,1

29,8

Tests with PID with 60°C target temperature

The new PID feature is simply a game changer. You simply set the desired temperature and the NQ++ does the magic on the software layer. This makes extremely quiet or even silent setups possible.

Thermalright AXP90-X36

FanNoisePower W/UIPower W/SmartmeterASIC Temp °CV. Reg Temp °CFan speed %RPM
Thermalright TL-9015B

+

81,1

94,1

60,2

54,6

43

1587

Noctua NF-A9x14

++

80,9

94,3

60,1

57,8

41

1384

Noctua NF-A12x25 PWM

+

81,1

98,5

59,9

49,7

54

1277

Noctua NF-F12 iPPC 3000 PWM

+

81,1

96,4

60,1

49,3

29

971

Noctua NF-F12 PWM

++

81,1

93,3

59,9

49,1

63

1003

Bewinner 7500 RPM

+

78,4

90,1

53,2

43,3

14

1344


Thermalright AXP90-X47 Full

FanNoisePower W/UIPower W/SmartmeterASIC Temp °CV. Reg Temp °CFan speed %RPM
Thermalright TL-9015B

+

77,9

94

57,2

60,2

43

1463

Noctua NF-A9x14

++

78,9

92,8

58,3

60,3

43

1453

Noctua NF-A12x25 PWM

+++

79,3

93,4

59,9

52,2

48

1145

Noctua NF-F12 iPPC 3000 PWM

++

79,0

89,0

59,8

51,9

25

846

Noctua NF-F12 PWM

+++

79,5

92,4

60,3

51,7

56

901

Bewinner 7500 RPM

+

75,6

86,4

52,3

44,6

15

1353


Thermalright AXP90-X53 Full

FanNoisePower W/UIPower W/SmartmeterASIC Temp °CV. Reg Temp °CFan speed %RPM
Thermalright TL-9015B+81,596,553,359,7611908
Noctua NF-A9x14+81,196,652,959,7641664
Noctua NF-A12x25 PWM+++85,594,159,955,0441053
Noctua NF-F12 iPPC 3000 PWM++85,594,559,955,624802
Noctua NF-F12 PWM+++85,89460,055,151822
Bewinner 7500 RPM+79,889,949,445,7151346

Tests with PID with underclocking & undervolting

As mentioned above, overclocking is the first thing many people think of. But my personal favorite is definitely underclocking and undervolting. This didn't really work with the NERDQaxe+, you simply lost too much hash rate and the BM1368 is a bit of a diva. With the BM1370 ASIC, this is much easier to do and you can actually conjure up extreme performance potential from very low power consumption. And most importantly, most setups are completely silent, I mean really ABSOLUTELY silent.

The criteria remain the same as mentioned above. Only the frequency was set to 495 MHz and the core voltage to 1.085 mV, and the PID feature is used with a target setting of 60°C.

With these settings, you can achieve an average of 4 Th/s (4039 Gh/s), which is truly incredible in my opinion.

Thermalright AXP90-X36

FanNoisePower W/UIPower W/SmartmeterASIC Temp °CV. Reg Temp °CFan speed %RPM
Thermalright TL-9015B

++++

62,8

71,0

60,0

54,0

31

1057

Noctua NF-A9x14

++++

63,7

71,2

60,1

55,1

32

1115

Noctua NF-A12x25 PWM

++++

63,1

72,1

60,0

46,6

39

941

Noctua NF-F12 iPPC 3000 PWM

+++

63,6

70,9

60,1

46,3

21

712

Noctua NF-F12 PWM

++++

61,9

70,1

59,9

46,4

40

654

Bewinner 7500 RPM

+

59,9

66,5

47,7

37,1

15

1348


Thermalright AXP90-X47 Full

FanNoisePower W/UIPower W/SmartmeterASIC Temp °CV. Reg Temp °CFan speed %RPM
Thermalright TL-9015B

++++

61,6

69,8

60,1

57,1

26

911

Noctua NF-A9x14

++++

61,6

69,2

59,8

56,1

24

850

Noctua NF-A12x25 PWM

++++

61,9

70,5

60,0

49,1

33

809

Noctua NF-F12 iPPC 3000 PWM

+++

62,0

70,8

59,5

48,3

18

608

Noctua NF-F12 PWM

++++

62,1

70,6

60,3

48,8

39

638

Bewinner 7500 RPM

+

57,4

69,9

47,8

39,1

15

1344


Thermalright AXP90-X53 Full

FanNoisePower W/UIPower W/SmartmeterASIC Temp °CV. Reg Temp °CFan speed %RPM
Thermalright TL-9015B

++++

64,1

73,4

55,8

60,0

30

1040

Noctua NF-A9x14

++++

65,6

72,4

57,8

60,4

32

1113

Noctua NF-A12x25 PWM

++++

67,0

73,9

60,2

50,8

32

793

Noctua NF-F12 iPPC 3000 PWM

+++

67,1

75,3

60,1

51,1

18

607

Noctua NF-F12 PWM

++++

66,8

72,5

60,1

50,8

37

604

Bewinner 7500 RPM

+

61,1

66,8

46,6

39,2

15

1349

Analysis

The test series really surprised me, as I had not seen any detailed tests anywhere else and therefore could not estimate what to expect from the NQ++.

I was particularly surprised that copper heat sinks on the VREGs are counterproductive and increase both the temperature and power consumption. But on second thought, it makes sense. Due to the close proximity, this area gets particularly hot, and another VREG has been added compared to the NQ+. The heat sinks create a thermal protective layer, and even with a 7500 RPM fan, you get worse results than without heat sinks.

NERDQAxe+ and NERDQaxe++ underclocked & undervolted

The second surprise was that the AXP90-X47 performs slightly better at cooling the ASIC and significantly better when it comes to dissipating air to the VREGs than the AXP90-X53. I really didn't expect that... In particular, the slightly greater copper height of the AXP90-X53 significantly reduces the airflow to the VREGs and causes them to become significantly warmer.

The use of the Noctua NF-F12 PWM is also very exciting; I would not have thought that it would be the better choice in many areas than a Noctua NF-A12x25 PWM or Noctua NF-F12 iPPC 3000 PWM. It is undoubtedly the first choice for PID setups in particular, as it is extremely quiet to silent and in some cases even cools better. This is due to the fin shape, which allows a significantly greater volume of air to be moved, making this form factor a clear winner for PID setups.

The power supply is a major drawback; one can only hope that the manufacturer/retailer will reconsider and include a more powerful power supply. However, I would still stick to my recommendation to use a reliable and repeatedly tested Mean Well LRS-150-12 – it is simply much more stable and safer.

Optimizations

All three coolers are adequately sized, but the 92 mm fan models are not really designed for a powerhouse like the NQ++. In all tests, the fans were the limiting factor in VREG cooling. When operating the 92 mm fan setup, care should be taken to push the fan as far up as possible. This creates a small gap above the cooler so that the fan can blow a small airflow towards the VREGs. However, a 120 mm fan solution should generally be considered.

In my opinion, the NQ-Helix shroud is an absolute must. Not only does it cool the ASIC processors much more effectively, but it also cools the hot VREGs. Without the shroud, I wouldn't even attempt to overclock if you want to enjoy your NERDQaxe++ for a long time.

The NQ-HELIX Shroud allows all 120 mm fans to be used. Even the cheapest fans you have, in combination with the PID feature, will put a smile on your face. 

NQ HELIX shroud for NERDQaxe for 120 mm fans

Another tip would be to use my spacers instead of the ones supplied. When designing the NQ-Helix shroud, I took into account that the contact pressure is slightly increased, which results in significantly better cooling performance of the four BM1370s. This also makes the cooler much easier to install, as the screws do not fall out of the PCB and you can position and attach the cooler without any problems.

I don't want to repeat myself, but this is so important in my opinion. Replace the power supply, buy a Mean Well LRS-150-12 and the power cables linked above. The power cables are also essential, at least 16 AWG, this is simply a must!

Recommendation

My recommendation would actually be underclocking and undervolting, as it just feels right. Especially with the new PID feature, which is a game changer...not just for the NQ++ but also for the NERDQaxe+.

Otherwise, run the NQ++ at standard frequency, but reduce the core voltage to 1.020 – especially if you are using the supplied power supply. The speed remains the same at around 4.8-5.1 Th/s, but the NQ++ consumes significantly less power, generates less heat, and you should also be “safe” with the supplied PSU.

I wouldn't even consider overclocking unless you replace the components discussed in this article. Unless you're adventurous and can live with a defect.

I would therefore perhaps make two recommendations:

  1. Operation at standard clock speed of 4.8-5.1 Th/s: AXP90-X47 Full with Noctua NF-A12x25 PWM or Noctua NF-F12 PWM and, of course, the NQ-Helix Shroud, use PID feature
     
  2. Operation at 4 Th/s: AXP90-X47 Full and Noctua NF-F12 PWM, NQ-Helix Shroud with PID feature.

If you would like to support my work and save 10% at the same time, regardless of whether you purchase a Bitaxe or NERDQaxe++ from PowerMining, always use the code “OCaxe”. 

Share this information with all your friends so that we both benefit and you can support me in a simple way.

Next step

In this article, I also wanted to try out some more extreme overclocking, but I realized that I still had some preparations to make. What is quite easy with Bitaxe requires much more consideration with NQ++. This doesn't just mean cooling, but also a stable and sufficient power supply. 14 AWG power cable, a power supply with at least 200W, consideration of which cooler and fan combination to use, obtaining some fuses, and a few other things.

NERDQaxe++ overclocked to 6.5 Th/s

For this reason, it will be a separate article, in which we will take a detailed look at overclocking and some more extreme overclocking.

OC'axe

Knowledge transfer, services and products for the Bitaxe ecosystem. Primarily focused on cooling concepts and optimisations of hardware and software. 

Contact
Andreas
Founder

Interested in digital progress, alternatives in finance, Bitcoin mining processes, in particular open source developments.