OC'axe

Manufacturer

NerdQaxe++ overclocked to 10 Th/s, outside of any specifications


27. May 2025, 21:12
Germany
Analysis

NerdQaxe++ is currently the most advanced home miner, capable of delivering a hash rate of 5 Th/s with ease. Thanks to optimizations, this impressive piece of hardware can be operated completely silently with excellent efficiency. However, what would be possible if one were to push the hardware to its limits and even risk a malfunction?

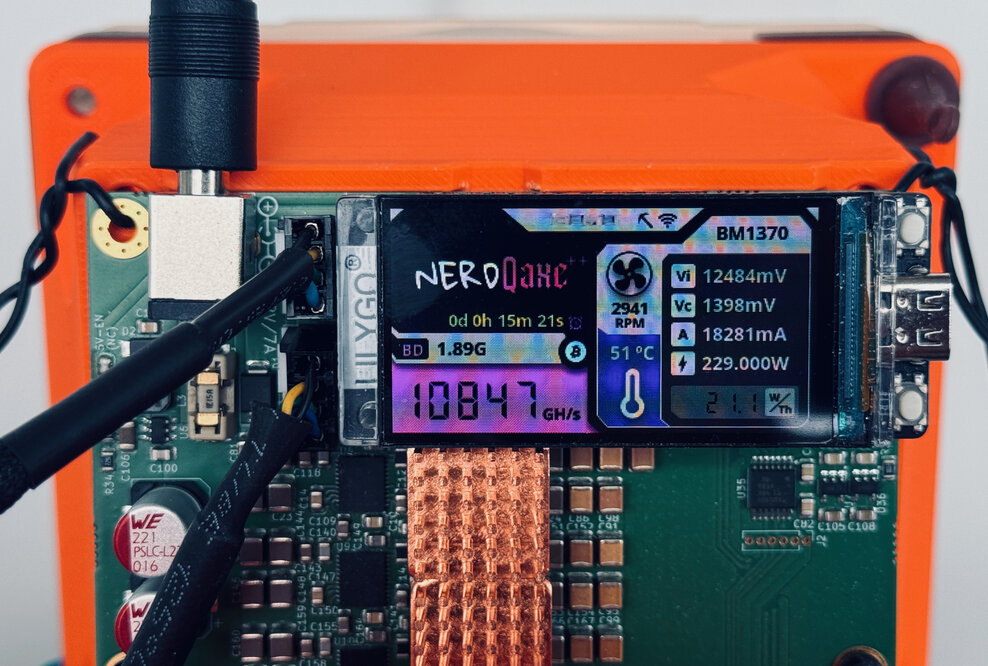
NerdQaxe++ world record overclocked to 10 Th/s

Just plain unreasonable

The first article about the NerdQaxe++ explained in detail what this small but very efficient home miner can and cannot do. Many users are happy to simply plug in the miner and let it run, but their wishes and requirements are complex and varied.

However, there is also a significant group of enthusiasts who like to push the hardware to its limits and get the maximum performance out of it. Just like my first journey with the Bitaxe, venturing into unknown territory in OC, there is no test data or recommendations for the new NerdQaxe++ on the internet. So if it doesn't exist, I see it as a challenge and want to know what the hardware can actually do.

There really is no safety net, no guarantees, and no backup plan for this test. I went into this test with the intention of pushing it to the limit, even if it meant risking a defect. At the same time, it is probably the first world record set with the new NerdQaxe++ with air cooling – but even with water cooling concepts, I have not yet seen anything that has managed to squeeze a stable 10 Th/s out of four BM1370 ASICs.

So consider this article a case study if you're wondering how high you can push a NerdQaxe++ – here's your answer. Suffice it to say, the NerdQaxe++ is a damn stable piece of hardware, without compromises and almost a no-brainer in the multi-ASIC concept.

Hardware employed

The NQ++ was offered worldwide for the first time by PowerMining, and the first batch sold out completely within a few hours/days. This is not surprising, as never before has there been so much hash rate in such a small space at such an affordable price. Within a very short time, PowerMining has not only become an extremely affordable seller, but also the largest manufacturer in Europe – and one that simply impresses in many areas.

NERDQaxe++

The build quality is really perfect; all my tests, especially in extreme overclocking, were carried out with PowerMining devices. Worldwide and fast shipping leaves nothing to be desired, and the support team is quick and friendly if you have any problems.

Speaking of price: with the code “OCaxe,” you can save 10% on your entire order at PowerMining. So if you don't want to miss out on the May batch of the NerdQaxe++, now is your chance.

Preparations and setup

The NerdQaxe++ with its four BM1370s achieves a hash rate of 4.8 Th/s with standard settings. When overclocked, it easily reaches 6.0-6.5 Th/s, but it should be noted that a 120 mm fan and the NQ-HELIX should be used for optimal cooling. It is also essential to use a Mean Well LRS-150-12 power supply, as mentioned in the first article, as the power supply included is not designed for overclocking. Not even a little bit, because the PSU is not designed for this – furthermore, you risk hardware damage and automatic loss of warranty.

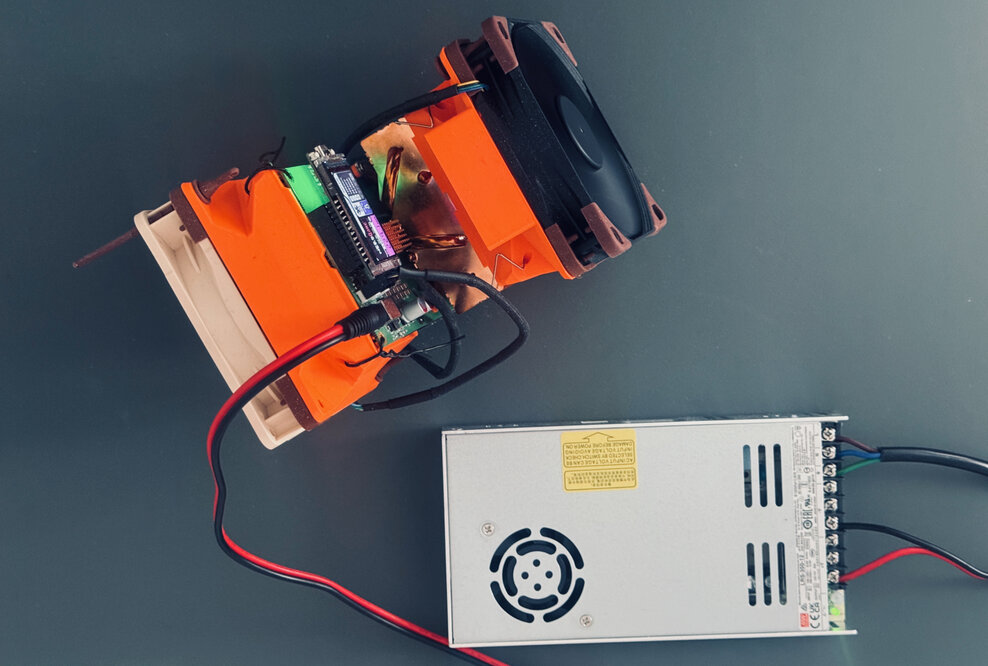
To ensure that the NerdQaxe++ is optimally powered, especially with such high overclocking as 10 Th/s, it is simply mandatory to use a powerful PSU. In my case, I opted for the Mean Well LRS-350-12. It offers 85% efficiency and can therefore be loaded with a maximum of 295.8 watts. It was set to 13.0v, as experience has shown that the voltage drops at high power consumption, but I wanted to achieve a stable voltage of at least 12.1-12.5v.

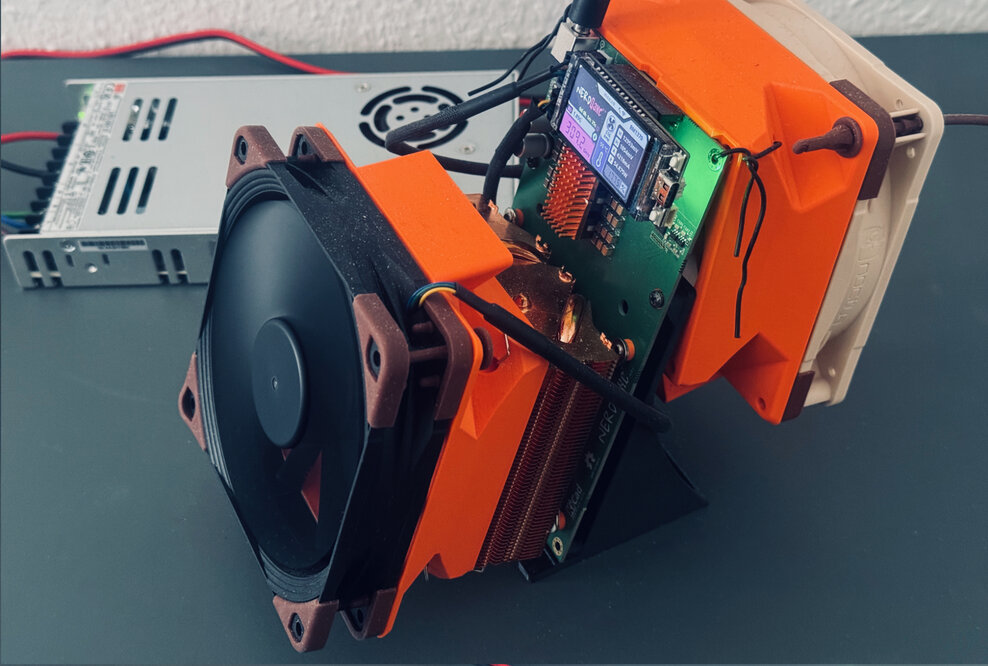
NerdQaxe++ with two 120mm Noctua fans and a Mean Well LRS-350-12 PSU

Wherever there is a lot of current flowing, high-quality power cables are an absolute must. Here, I opted for 14 AWG cable cross-section, but in hindsight, 12 AWG would have been better.

The NerdQaxe++ comes standard with an 8 amp fuse, which is absolutely sufficient, even if you overclock slightly. I would say that the 8 amp fuse is sufficient for an ASIC frequency of around 650-700 MHz. However, take into account the points mentioned above, PSU and cable cross-section – without these measures, you should not attempt overclocking for safety reasons!

For my test, I had 12A fuses, which unfortunately were not sufficient. So I got 15A fuses for the NerdQaxe++, which should really be the absolute maximum, because we are really in very dangerous current ranges here and it is definitely no longer fun.

Customized firmware for the requirements

The latest 1.0.29.1 firmware was used, but it had to be modified. The standard firmware allows a maximum overclocking of 800 MHz, which I think is perfectly reasonable and that higher overclocking should not be offered to the general public. Safety always comes first!

In my case, an “OC” version was required, which increases some relevant limits. In this specific case, the limits for the frequency and maximum output for current were raised to 180 amps, allowing the maximum ASIC voltage to be increased to 1.52v.

And before any questions arise: no, I cannot offer this firmware for download. I do not want to be responsible for devices breaking. More importantly, these settings and incorrect handling could cause a house fire.

Plebs who are familiar with OC know that simply increasing the values is irresponsible. However, those who are familiar with the subject can compile their own version of the firmware.

Cooling concept

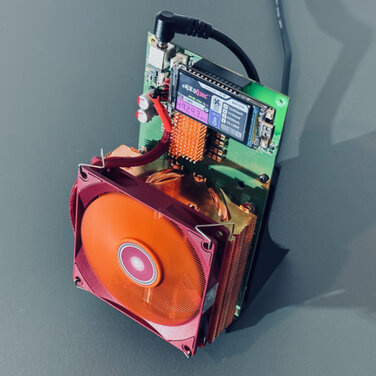
For cooling, I started with the full copper cooler from Thermalright, model x47, but had to switch to the x53 during testing. In the first article, I recommended the x47 model, and I stand by that. However, the behavior is slightly different in such an extreme test; I wanted to ensure that the ASIC temperature did not get in the way. In this 10 Th/s test, the ASIC temperature was not actually the problem, but rather the hot VREGs.

NameMaterialWeightDimensions (L/W/H)Thermal Power Capability
Thermalright AXP90-X47 Full

copper

460 g

94.5 x 95 x 32

145 W

Thermalright AXP90-X53 Full

copper

540 g

94.5 x 95 x 38

165 W

I decided to use the Noctua NF-F12 iPPC 3000 PWM on the Thermalright x53 because it simply delivers significantly higher static pressure than the Noctua NF-A12x25 PWM. However, the Noctua NF-A12x25 PWM was also used, because with such high overclocking, you not only have a problem with the VREGs, but also with the back of the PCB in the area of the ASICs, as well as in the VREG area.

Name

RPM

CFM

dB(A)

static pressure 
mmH2O

Noctua NF-F12 iPPC 3000 PWM

3000

186,7

43,5

7,63

Noctua NF-A12x25 PWM

2000

102,1

22,6

2,34

For the thermal paste, I opted for Thermal Grizzly Kryonaut Extreme due to its perfect properties and high thermal conductivity.

I used the spacers I developed between the PCB and the cooler and the NQ-HELIX shroud, which made this test possible in the first place.

Testing process

I started cautiously by playing around with values such as frequency and voltage. Since I had absolutely no reference values, it was a trial and error process that taught me a lot.

My 8 amp fuse, which comes standard with the NQ++, blew at a frequency of 800 MHz. So I quickly switched to a 12 amp fuse in the hope that this range would be sufficient. But even this fuse blew shortly before reaching 1000 MHz.

The choice fell on a 15 amp fuse, which was also chosen as the absolute last option. We're talking about 15A on a small home miner here, so those who know something about electrical engineering will certainly know what we're talking about. In addition, I had no way of knowing whether other components on the NQ++ could withstand this extreme load.

Luckily, I had two NQ++ units and simply took one without thinking too much about it. When setting the frequency and voltage manually, I quickly reached 7.7 Th/s with the NQ++. However, anything above that did not increase the hash rate. It didn't matter whether I increased the frequency or voltage, 7.7 Th/s was the limit. I was actually a little disappointed because the temperatures of the ASICs and VREGs were completely within range, as was the power consumption.

NerdQaxe++ with two 120mm Noctua fans and a Mean Well LRS-350-12 PSU

But then I remembered a discussion on Discord about the nonce distribution in the NQ++ log. According to the developer, this value is a good indicator of the quality of the ASIC and should be the same for all four ASICs if possible. However, since this is technically impossible, all four values should be as close to each other as possible.

That said, we're not talking about analyzing these values shortly after starting NQ++. The recommendation here was to compare these values only after the miner had been running for 3-6 hours. I did that and found that one ASIC was indeed performing significantly worse than the other three. This explained my limit of 7.7 Th/s for the first NQ++. I would like to note here that with standard values or undervolting/underclocking, the miner worked perfectly and always achieved the expected hash rate.

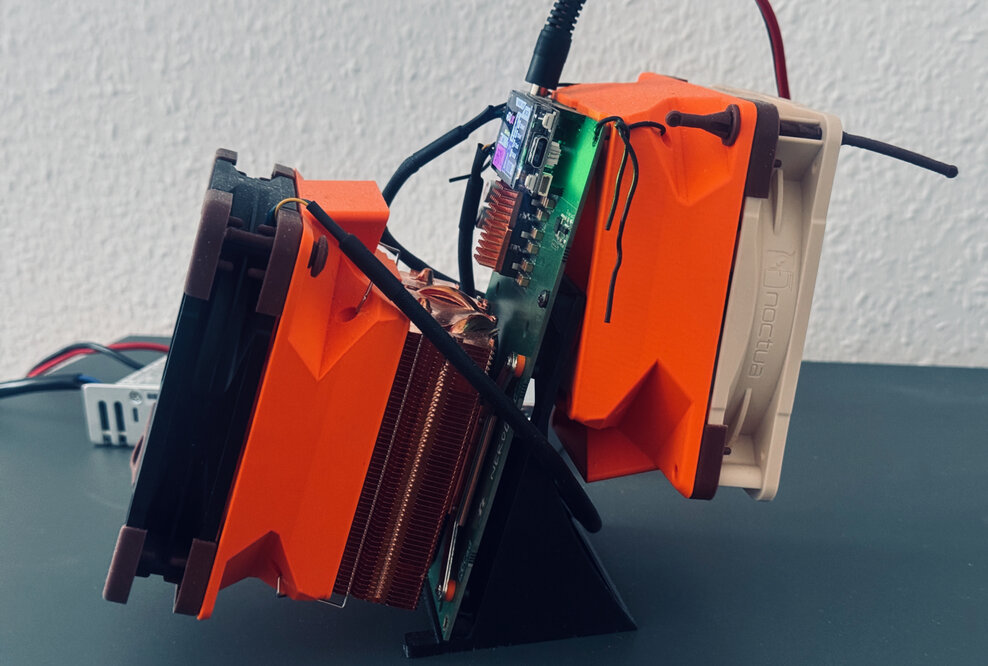
NerdQaxe++ with two 120mm Noctua fans and NQ-HELIX Shourd for cooling the PCB

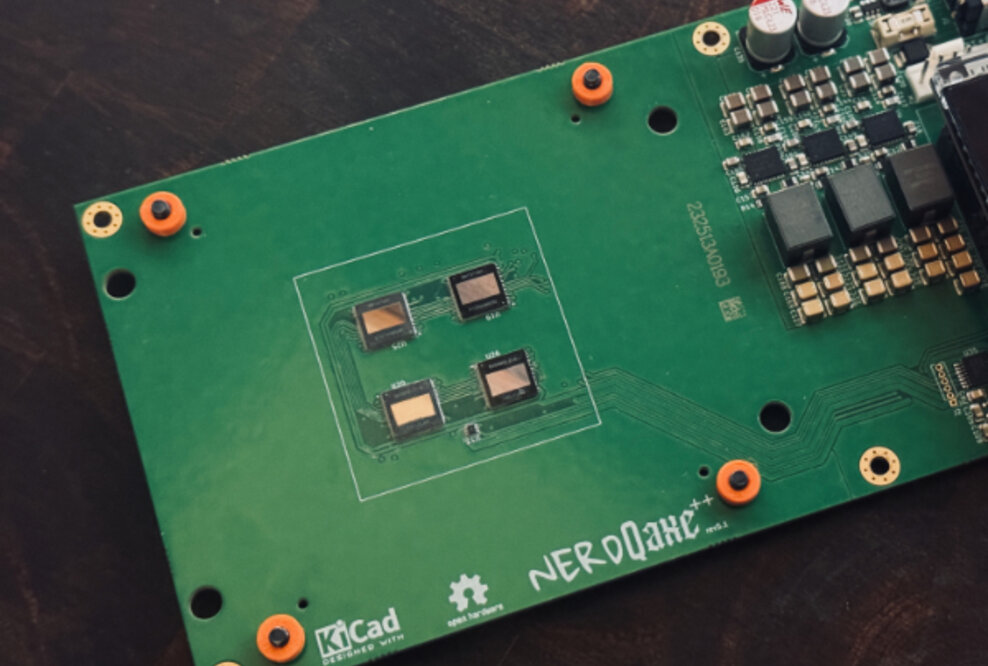
So I had the problem of the silicon lottery, which we already know from the Bitaxe ecosystem. If the ASIC processor itself is not optimal due to the manufacturing quality, you cannot expect high performance. And with the NQ++, we even have four processors that have to perform well in the silicon lottery.

So I took my second NQ++ for further testing and let it run for a few hours to analyze the nonce distribution. Fortunately, all four ASICs were in roughly the same range, so I was able to start further stress tests.

During testing, I also noticed that the cooling of the ASICs and VREGs was insufficient. The NQ++ always switched to emergency mode at around 8 Th/s. I noticed that the back of the PCB became extremely hot, so I got creative and simply took a second NQ-HELIX Shroud and mounted it. The advantage here was that the back of the PCB in the VREG area was extremely well cooled and, thanks to the geometry and the nose, a large air flow was directed directly onto the solder contacts of the ASICs. This allowed me to further increase the hash rate, which was only possible thanks to this measure.

Test series

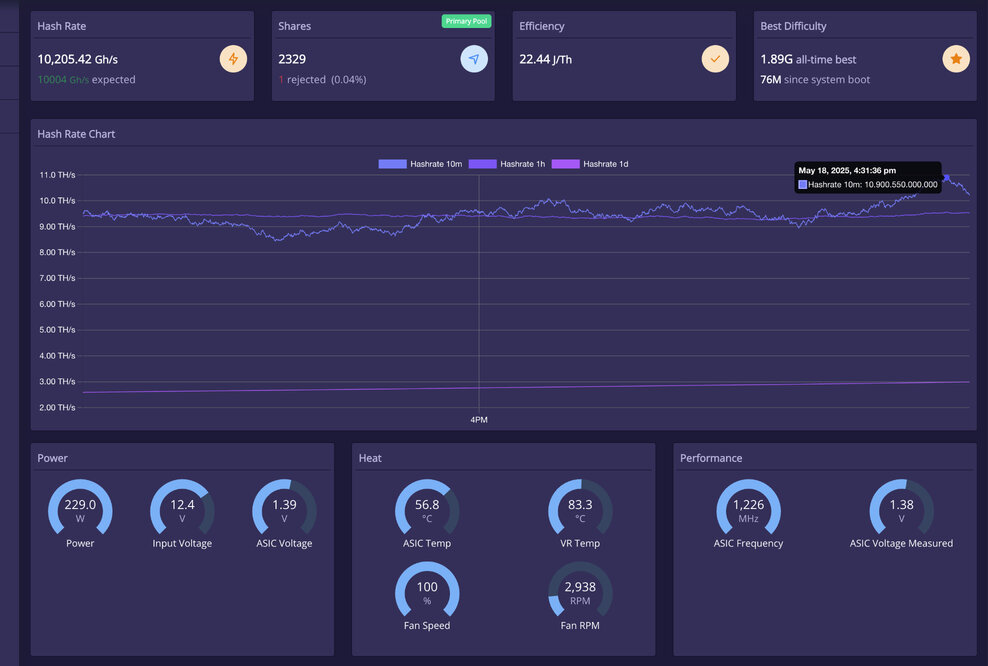
I tried to cover as wide a range as possible with my tests so that the values can be easily compared and, above all, so that the development can be seen. The value I achieved was at a frequency of 1.226 MHz and a voltage of 1.4 V; anything above that did not work well or remain stable.

FrequencyExpected 
hash rate
Power UI
Watt
Power socket
Wattt
Input VoltageASIC VoltageASIC TempVR Temp
800

6.528

121,6

142,6

12,8

1.250

49,3

47,1

900

7.344

143,4

165,4

12,8

1.275

50,6

55,2

1.000

8.160

157,0

191,3

12,7

1.275

51,7

59,9

1.100

8.976

188,9

217,4

12,6

1.325

52,7

69,7

1.200

9.792

227,5

269,1

12,4

1.375

55,3

79,9

1.226

10.004

229,8

293,3

12,4

1.400

57,1

83,5

The values are indeed very interesting, especially when you look at the progress of the voltage, frequency, and power consumption. But the temperatures themselves also provide a good insight into what the NQ++ is capable of and, above all, whether it makes sense.

The power consumption measured directly at the power outlet in particular clearly shows why you need not only a good PSU but also the right cable cross-section. Remember, according to the specifications, the Mean Well LRS-350-12 can be loaded with a maximum of 295.8 watts at 85% efficiency. Now, at a frequency of 1.226 MHz and a voltage of 1.4 V, 293.3 watts were measured. As a general rule, even if it is designed for it, the power supply should not be loaded beyond 80% – here we have completely exhausted this value.

In addition, the 14 AWG cables became quite warm. Not too hot, which is good, but the heat generated by the cables indicates to me that at least 12 AWG should be selected for this power output.

NerdQaxe++ Dashboard with 10 Th/s

Final statement

This case study clearly demonstrates how well the open source miner from @Pmaxsd has been designed and developed. In the default settings, it simply delivers what you would expect. Whether it's the hardware or firmware, both have been perfectly coordinated. In my opinion, this extreme test is proof of how stable it really is.

It would probably be possible to push the hardware even further, but I didn't want to take that risk. We are already talking about 300 W from the power outlet and extreme stress on the components. The Mean Well LRS-350-12 was pushed to 100% capacity, as was the air cooling and the 14 AWG power cable.

With these settings, the NQ++ ran for over 5 days without showing any signs of weakness. So the test was definitely passed with flying colors.

In addition to the perfectly designed hardware from @Pmaxsd, the manufacturing quality of PowerMining is simply unique. They have built the hardware perfectly and I would definitely recommend it.


If you would like to support my work and save 10% at the same time, regardless of whether you purchase a Bitaxe or NERDQaxe++ from PowerMining, always use the code “OCaxe”. 

Share this information with all your friends so that we both benefit and you can support me in a simple way.
 

Cooling spacer for perfect contact pressure on the ASIC

The overall concept of the multi chip home miner is extremely coherent, and I would even go so far as to say that this platform is more stable than the Bitaxe platform itself. With the Bitaxe Gamma, I was able to achieve a world record of 1,224 MHz, but I had to follow an extremely long list of steps to do so. In comparison, overclocking the NQ++ was significantly easier than my Bitaxe.

But of course, the usefulness of such extreme overclocking is also questionable. In my opinion, it makes no sense at all to run the NQ++ at this brutal hash rate because you run the risk of damaging the miner. Every overclock shortens the miner's lifespan, so my personal recommendation here is clear. It is better to undervolt and underclock, as recommended in the first article.

It is better to scale up the number of miners if you want to achieve 10 Th/s with the multi ASIC miner. This not only increases the service life of the device, but also significantly reduces operating costs. With two NQ++ units, you don't use 300 watts of electricity.

And one more thing, because I didn't go into how to actually overclock the NQ++. This case study is aimed at enthusiasts who know what they are doing or want to learn. I have therefore not included step-by-step instructions in this article. However, I can refer you to the excellent OC step-by-step guide by @Bolster, where you can find out everything you need to know about overclocking the NQ++ correctly and safely.

OC'axe

Knowledge transfer, services and products for the Bitaxe ecosystem. Primarily focused on cooling concepts and optimisations of hardware and software. 

Contact
Andreas
Founder

Interested in digital progress, alternatives in finance, Bitcoin mining processes, in particular open source developments.